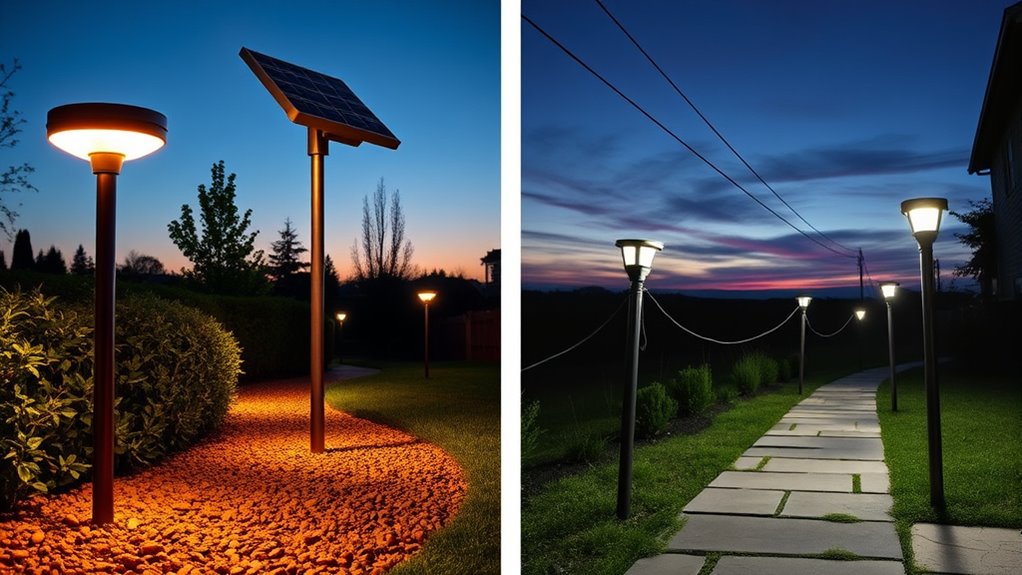

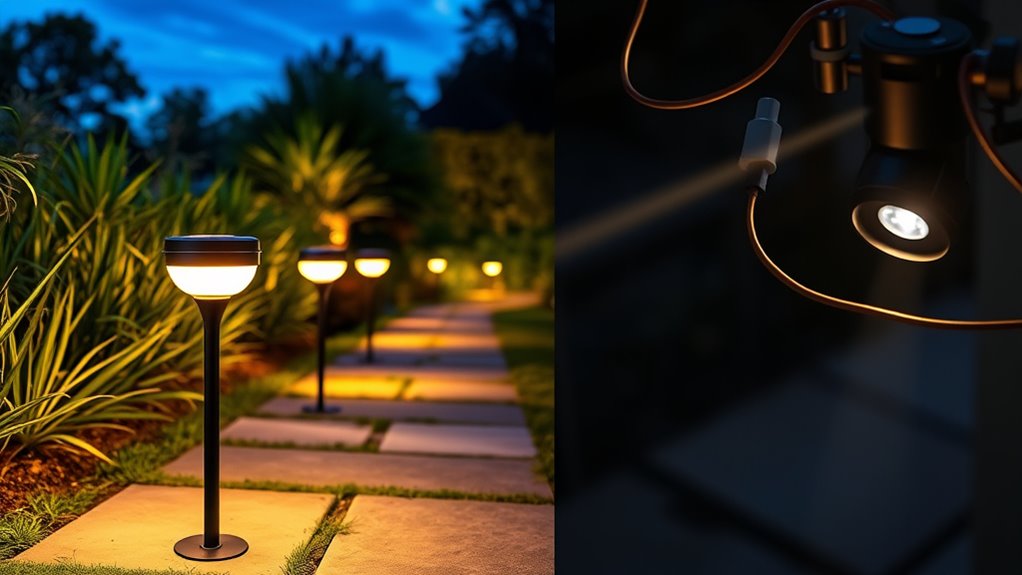
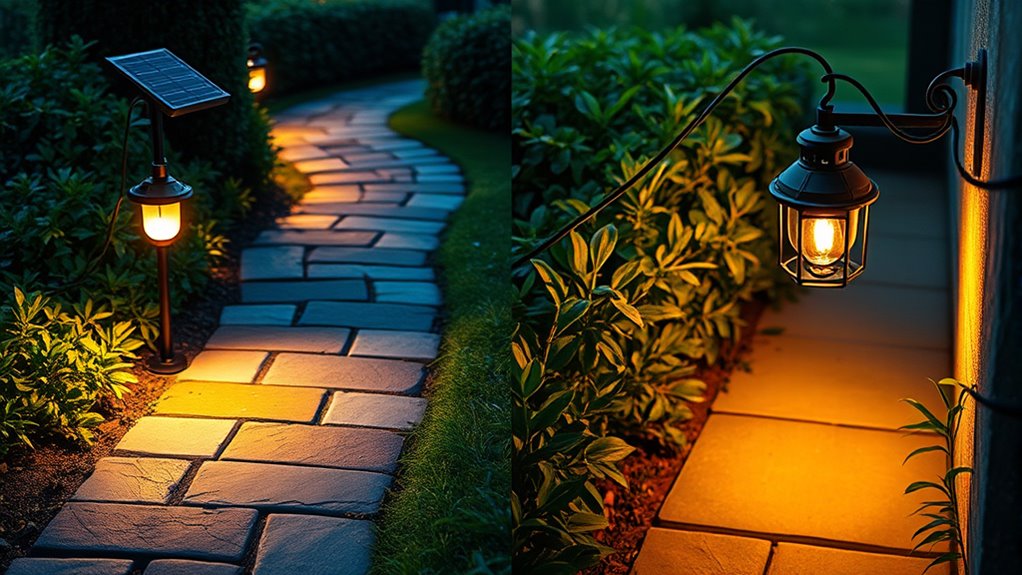
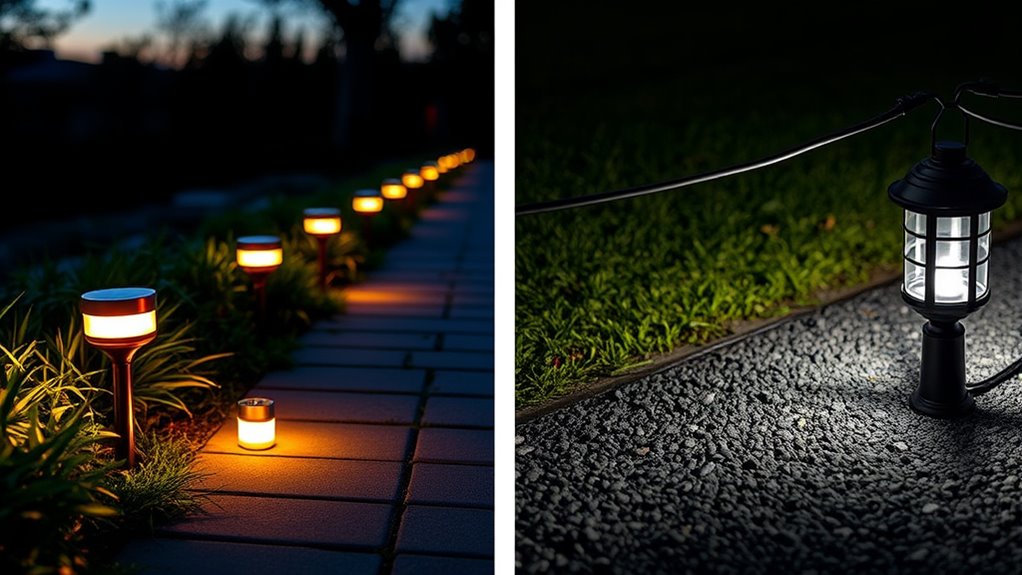
Solar pathway lights use sunlight to generate power and include solar panels, batteries, and LEDs, making them eco-friendly and easy to install without wiring. Low-voltage wiring systems rely on grid power, using cables, transformers, and waterproof connectors for brighter, more consistent illumination. While solar lights are budget-friendly and low maintenance, low-voltage setups offer greater control and design options. To discover which option suits your outdoor space best, explore the full details below.
Key Takeaways
- Solar pathway lights rely on built-in solar panels and batteries, powering LEDs automatically at night without external wiring.
- Low-voltage wiring systems use transformers and outdoor cables connected to grid power for consistent illumination.
- Solar lights have lower upfront costs, are eco-friendly, and require minimal maintenance, while low-voltage systems offer brighter, more reliable lighting.
- Proper installation of low-voltage wiring involves trenching, waterproof connections, and careful layout planning; solar lights are simpler to install.
- Solar pathway lights are affected by weather and location, whereas low-voltage wiring provides stable performance regardless of sunlight conditions.
Understanding How Solar Pathway Lights Work
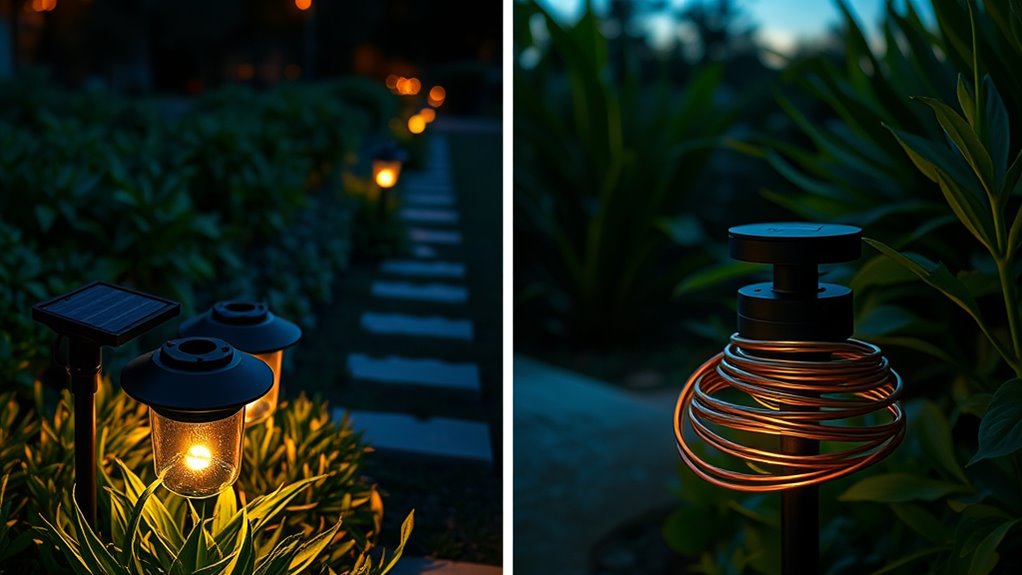
Since solar pathway lights rely on sunlight to operate, understanding how they work begins with knowing their main components. Typically, they include a solar panel, a rechargeable battery, a light source like an LED, and a control system. During the day, the solar panel absorbs sunlight and converts it into electrical energy, which charges the battery. When night falls, the control system detects low light levels and automatically turns on the LED light. The stored energy from the day powers the light throughout the night. This self-sufficient system eliminates the need for wiring or external power sources, making installation simple and eco-friendly. Additionally, understanding vertical storage solutions can help maximize space for solar panel installation and other components in your outdoor area. Proper placement and battery maintenance are also essential to ensure long-term performance and efficiency of your solar lighting system. Regular upkeep of the battery and choosing optimal solar panel positioning can significantly extend the lifespan and effectiveness of your lights, while system troubleshooting can help identify and resolve common issues to keep your lights functioning optimally. Moreover, selecting high-quality components can enhance durability and overall system reliability.
Exploring Low-Voltage Wiring Systems for Outdoor Lighting
When choosing a low-voltage wiring system for your outdoor lighting, you’ll want to think about the different wiring types and their compatibility with your fixtures. Proper installation is vital for safety and performance, so following best practices and tips can save you time and hassle. Additionally, understanding your power sources helps maximize efficiency and guarantees your pathway stays well-lit all night.
Wiring Types and Compatibility
Understanding the different wiring types is essential when planning your outdoor pathway lighting, especially with low-voltage systems gaining popularity for their safety and energy efficiency. The most common wiring options include direct burial cables, which are designed to withstand outdoor conditions and can be buried underground without additional protection. You might also encounter conduit systems, where wires are run through protective tubing for added durability and flexibility. Compatibility depends on your fixtures and transformer; most low-voltage systems use 12 or 24 volts, so ensure your wiring matches these specifications. Additionally, check the gauge of the wire—thicker gauges handle more current and are suitable for longer runs or higher wattage fixtures. Choosing the right wiring type and ensuring compatibility helps prevent issues and guarantees a safe, reliable outdoor lighting setup. When selecting a wiring method, consider the robustness and durability of the cables to ensure long-term performance in outdoor conditions and the specific wiring compatibility with your fixtures and transformer. Proper installation and understanding of these wiring options are crucial for a safe and efficient outdoor lighting system. Moreover, reviewing Alaskan anecdotes about historic farmhouses can offer insights into traditional building materials and practices that emphasize durability and resilience in outdoor structures.
Installation Procedures and Tips
Installing low-voltage outdoor lighting requires careful planning and proper technique to guarantee safety and longevity. Begin by mapping out your lighting layout, considering desired focal points and pathways. Use a landscape wire tracer to avoid damaging existing underground utilities. When burying wiring, keep it at least 6-8 inches deep to prevent accidental damage. Use waterproof connectors and weatherproof junction boxes to protect connections from moisture. Always test the system before final burying to ensure all fixtures work correctly. Maintain consistent wire gauge for uniform voltage distribution. Avoid sharp bends and kinks in the wire, which can cause damage or voltage drops. Additionally, understanding the weight of pinball machines can be useful if you plan to incorporate gaming elements into your outdoor space, ensuring proper support and placement. To ensure reliable operation, it’s important to use the correct types of cookies in your online planning tools and resources to enhance your project management experience. Incorporate light distribution patterns to achieve even illumination across your landscape. Proper grounding techniques are essential for safety and system durability, especially when working with outdoor electrical systems. Finally, follow manufacturer instructions closely for each fixture and component, and double-check all connections before powering on your system.
Power Sources and Efficiency
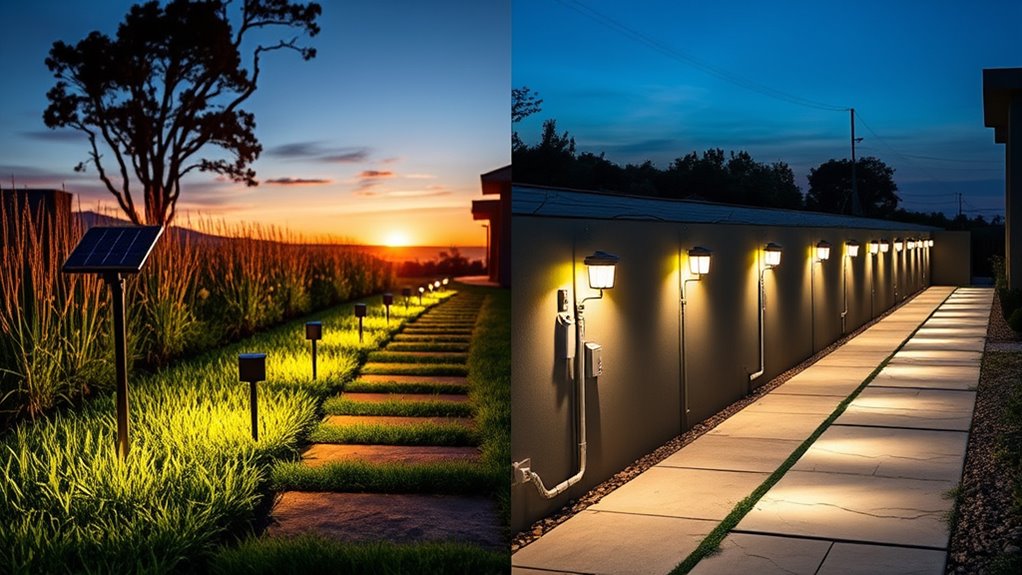
Choosing the right power source for your outdoor lighting system can considerably impact its efficiency and safety. Low-voltage wiring systems, typically 12V or 24V, are safer and more energy-efficient than traditional 120V systems, reducing the risk of electrical shock. Solar-powered lights harness sunlight, making them eco-friendly and cost-effective, especially in sunny areas. However, they depend on weather conditions and may have limited brightness or runtime. Low-voltage systems require a transformer to step down mains voltage, which improves safety and allows for longer cable runs without significant power loss. Both options can be highly efficient if properly installed and maintained. Your choice depends on factors like location, budget, and desired brightness, but understanding these power sources helps you make informed decisions for a safe, effective outdoor lighting setup.
Installation Process and Requirements for Solar Lighting

Before starting the installation of your solar pathway lighting, it’s vital to review the specific requirements and gather all necessary tools and materials. You’ll need solar-powered lights, a drill, screws or stakes, a screwdriver, and possibly a level. Make certain your chosen location receives ample sunlight throughout the day for maximum performance. Clear the area of debris and obstacles that could block sunlight or hinder installation. Mark the spots where each light will go, maintaining even spacing for a uniform look. Follow the manufacturer’s instructions for mounting, whether staking into the ground or attaching to surfaces. Check the battery compartment and connections to make sure everything is secure. Proper preparation helps your solar lights operate efficiently and last longer. Understanding industry trends can also help you select the most effective and modern lighting options, including the latest advancements in solar panel efficiency. Additionally, reviewing bad lemon juice signs can remind you to inspect your outdoor lighting for any issues or spoilage that might affect performance. Staying informed about AI security advancements may also help in choosing reliable, secure lighting systems with integrated smart features. Being aware of Gold IRA options can also inform investment decisions related to your overall property and safety upgrades.
Step-by-Step Guide to Setting Up Low-Voltage Pathway Lights

Before you start installing your low-voltage pathway lights, you need to plan your wiring and layout carefully. This will help guarantee even lighting and prevent issues down the line. Always follow safety tips to protect yourself and get the best results from your setup. Be aware of potential symptoms of electrical issues that could arise, such as flickering lights or inconsistent brightness, which may indicate wiring problems or other concerns.
Wiring and Layout Planning
To guarantee your low-voltage pathway lighting is both effective and safe, start by planning the wiring and layout carefully. Map out your pathway first, noting where each light will go. Decide on the power source location and ensure the wiring follows a direct, unobstructed route. Keep in mind that shorter cable runs reduce voltage drop and improve performance. Use the table below to compare key layout considerations:
| Consideration | Tip |
|---|---|
| Spacing between lights | Space lights evenly for uniform illumination |
| Cable routing | Avoid underground utilities and sharp bends |
| Power source placement | Place near an accessible outlet or transformer |
| Future expansion | Leave room for adding lights later |
Proper planning guarantees a safe, efficient, and visually appealing setup.
Installation and Safety Tips
Installing your low-voltage pathway lights correctly is essential for safety and performance. First, turn off the transformer before starting to avoid electrical shocks. Plan your layout carefully, marking where each light will go. Dig shallow trenches along the pathway, keeping lines straight and consistent. Use a garden hose or spray paint to outline the cable route before digging. When laying cables, avoid damaging the wire insulation and keep connections dry and secure using waterproof connectors. Always follow manufacturer instructions for the transformer and fixtures. After installation, double-check all connections and ensure the circuit is properly grounded. Proper installation guarantees safety, longevity, and ideal lighting效果. Additionally, understanding the different wiring options can help you choose the most suitable setup for your landscape. Finally, turn the power back on and test your lights, adjusting their position if needed. Proper installation guarantees safety, longevity, and ideal lighting效果.
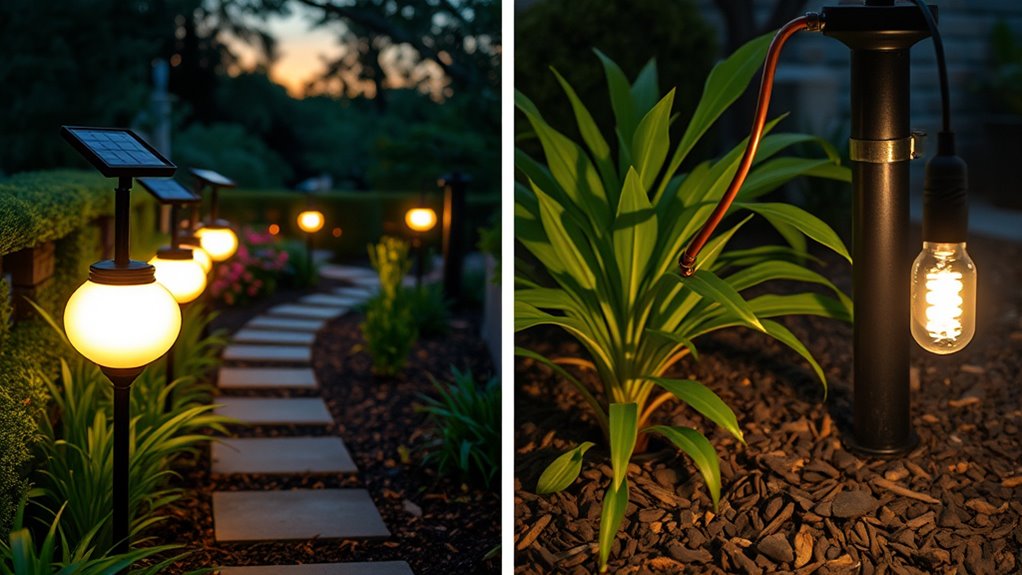
Comparing Energy Efficiency and Operating Costs
When evaluating pathway lighting options, understanding their energy efficiency and operating costs is essential. Solar lights typically have lower upfront costs and no ongoing electricity expenses, making them cost-effective over time. They rely on sunlight, so their performance depends on weather conditions and geographic location. Low-voltage wiring systems, on the other hand, use electricity from your grid, resulting in higher energy use and monthly utility bills. However, they often provide brighter and more consistent illumination, especially in areas with limited sunlight. While solar lights save money initially and are simple to install, low-voltage systems may incur higher energy costs but offer greater reliability and longer-lasting performance. Additionally, Kia Tuning modifications such as ECU remapping and suspension upgrades demonstrate how tailored adjustments can optimize vehicle performance and efficiency, similar to choosing the appropriate pathway lighting system for your needs. Your choice should balance initial investment, energy consumption, and long-term expenses.
Maintenance Needs and Longevity of Each System
Understanding the durability of your pathway lighting systems helps you plan for ongoing maintenance and replacements. You’ll want to contemplate how long batteries, panels, wiring, and other components typically last and what costs are involved over time. By evaluating these factors, you can choose a system that minimizes upkeep and maximizes longevity. Incorporating data-driven strategies can further assist in assessing the long-term performance and maintenance costs of different lighting options. Additionally, considering the lifespan of components can help you determine which system offers the best value over its expected lifetime. Regular inspections and understanding the average lifespan of batteries and LED lights can help prevent unexpected failures and optimize replacement schedules. Knowing the typical failure rates of various parts can also guide proactive maintenance plans.
Battery and Panel Durability
Battery and panel durability are crucial factors in maintaining reliable pathway lighting. Solar panels typically last 25–30 years with minimal degradation, but their efficiency can decrease over time. Batteries, on the other hand, usually need replacement every 3–7 years, depending on usage and quality. To maximize performance, consider these key points:
- Quality of materials: Higher-quality panels resist weather damage and UV degradation better.
- Maintenance routines: Regular cleaning and inspections extend battery life and panel efficiency.
- Environmental placement: Proper positioning protects components from extreme weather, reducing wear and tear.
Wiring and Component Lifespan
Wiring and other system components play a critical role in the longevity of pathway lighting, but they also require regular maintenance to stay in top condition. Over time, exposure to the elements can cause wiring insulation to degrade, leading to potential shorts or failures. Solar systems typically have fewer components, which means less maintenance, but their wiring may need checking for corrosion or damage from weather. Low-voltage wiring, often buried underground or exposed, is more susceptible to wear and environmental damage, possibly shortening its lifespan. Connectors, transformers, and fixtures can also wear out or corrode if not properly maintained. To maximize lifespan, inspect wiring connections periodically, guarantee proper sealing, and replace damaged parts promptly. Proper upkeep helps prevent failures and extends the overall durability of your pathway lighting system.
Maintenance Frequency and Costs
How often should you perform maintenance on your pathway lighting to guarantee it stays functional and cost-effective? Regular upkeep is essential for both solar and low-voltage systems. Here’s what to check:
- Solar Lights: Clean solar panels monthly to maximize efficiency and replace batteries every 2-3 years.
- Low-Voltage Wiring: Inspect connections annually for corrosion or damage, and tighten or replace components as needed.
- Overall System: Trim nearby plants regularly to prevent shading, which reduces solar panel performance and light output.
Solar systems generally require less ongoing costs but need battery replacements every few years. Low-voltage setups may have higher maintenance but can last longer with proper care. Staying proactive keeps your pathway lighting reliable and cost-effective over time.
Design Flexibility and Aesthetic Options
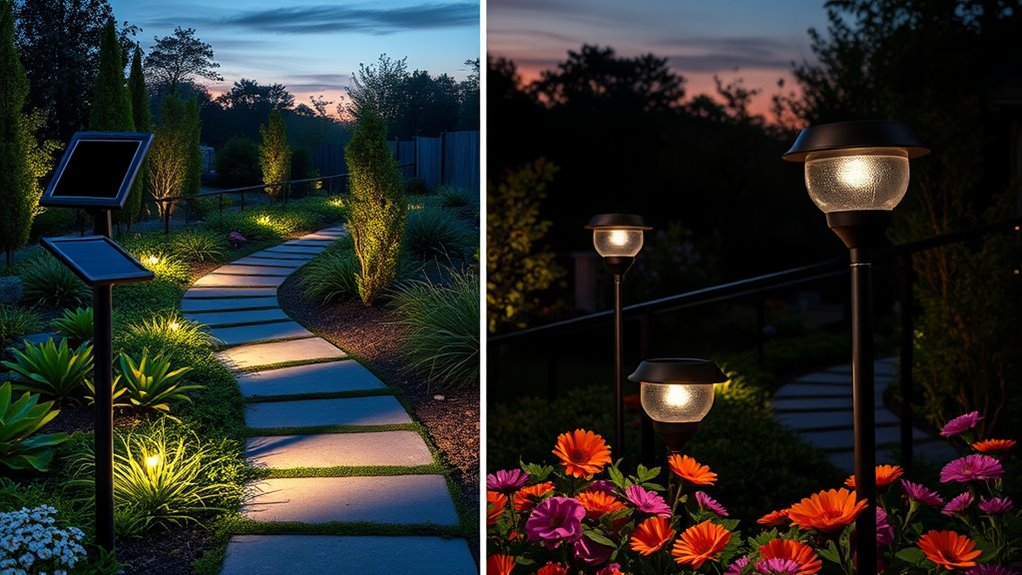
One of the key advantages of modern pathway lighting is its remarkable design flexibility and wide range of aesthetic options. You can choose fixtures that blend seamlessly with your landscape or serve as focal points, enhancing your property’s style. Materials like metal, glass, and stone allow customization to match your outdoor decor. Shapes and sizes vary, giving you the freedom to create both subtle pathways and striking features. Here’s a quick comparison:
| Aspect | Options |
|---|---|
| Fixture Styles | Traditional, contemporary, rustic |
| Materials | Metal, glass, stone, plastic |
| Mounting Types | Post, recessed, surface-mounted |
| Light Effects | Warm, cool, colored |
This versatility enables you to craft an inviting atmosphere tailored to your preferences and environment.
Cost Analysis: Initial Investment and Long-Term Expenses
Investing in pathway lighting involves balancing upfront costs with ongoing expenses to achieve your desired look and functionality.
Here’s what you should consider:
- Initial investment: Solar options typically cost less upfront but may require more frequent replacements or upgrades.
- Energy costs: Low-voltage wiring involves higher initial installation but generally results in lower long-term electricity expenses.
- Maintenance expenses: Solar lights are usually easier and cheaper to maintain, while low-voltage systems may need occasional wiring checks and bulb replacements.
Environmental Impact and Sustainability Considerations
Considering the environmental impact of pathway lighting is essential for making sustainable choices. Solar lights operate without electricity from the grid, reducing fossil fuel consumption and lowering greenhouse gas emissions. They use renewable energy, making them an eco-friendly option with minimal ongoing impact. Low-voltage wired systems, however, rely on electricity that often comes from non-renewable sources, contributing to pollution and resource depletion. Additionally, solar fixtures typically have a smaller manufacturing footprint and are easier to recycle or dispose of responsibly. Choosing solar lighting supports sustainability by decreasing your carbon footprint and conserving resources. While both options have some environmental considerations, solar pathway lights generally offer a more eco-conscious solution, aligning with efforts to protect the environment and promote renewable energy use.
Making the Right Choice for Your Outdoor Space

Choosing the right pathway lighting for your outdoor space involves balancing functionality, style, and environmental impact. To make an informed decision, consider these key factors:
- Sunlight availability: If your yard gets plenty of sunlight, solar lights are eco-friendly and low-maintenance.
- Desired brightness: For brighter, more reliable illumination, low-voltage wiring offers consistent power and customization options.
- Installation complexity: Solar lights are easy to install and ideal for DIY projects, while low-voltage systems may require professional wiring and permits.
Assess your outdoor environment, budget, and long-term goals. Whether you prioritize sustainability, brightness, or ease of installation, understanding these elements guarantees your pathway lighting enhances safety and style effectively.
Frequently Asked Questions
Can Solar Pathway Lights Operate During Cloudy or Rainy Days?
You wonder if solar pathway lights work during cloudy or rainy days. Generally, they do, but their brightness might be reduced because less sunlight reaches the panels. On overcast days, the batteries store less energy, so your lights may stay dim or turn off earlier. To guarantee consistent lighting, consider placing them in spots with maximum sun exposure and using high-quality panels that can better handle low-light conditions.
Are Low-Voltage Wiring Systems Safe for DIY Installation?
Think of low-voltage wiring as a gentle river flowing quietly through your yard—it’s safe when you respect its boundaries. You can definitely tackle DIY installation, but you must follow safety guidelines carefully. Turn off power before working, use proper tools, and double-check connections. If you’re unsure, consulting a professional ensures your pathway stays bright and your home remains safe, turning your project from a potential storm into a smooth sailing adventure.
How Often Do Solar Pathway Lights Need Battery Replacements?
Solar pathway lights typically need battery replacements every 1 to 3 years, depending on usage and weather conditions. You should check the batteries regularly, especially after harsh winters or extended cloudy periods. When your lights start dimming or stop working overnight, it’s a good sign to replace the batteries. Using high-quality batteries can extend their lifespan, ensuring your pathway remains illuminated without frequent replacements.
Can Low-Voltage Lights Be Integrated With Existing Outdoor Electrical Systems?
Imagine your outdoor space as a symphony, with each component playing in harmony. Low-voltage lights can seamlessly join this orchestra if your existing system is compatible. You’ll need to guarantee your current wiring matches the low-voltage requirements and that the connections are secure. With proper planning, you can easily integrate these lights, like adding a new instrument to enrich your outdoor melody.
Which Lighting System Is More Resistant to Harsh Weather Conditions?
When considering which lighting system handles harsh weather better, you should know that solar lights are generally more resistant to extreme conditions because they have fewer electrical components and are designed to withstand outdoor elements. Low-voltage systems, while reliable, include wiring and connectors that can be vulnerable to moisture and temperature fluctuations. So, if durability in harsh weather matters most, solar lighting often offers a more resilient solution.
Conclusion
Ultimately, choosing between solar and low-voltage pathway lighting depends on your needs and budget. Solar lights are a no-brainer if you want easy installation and eco-friendliness, while low-voltage systems offer more flexibility and brightness. Don’t put all your eggs in one basket—consider your outdoor space and long-term goals. By weighing your options carefully, you’ll be able to light up your landscape just right and avoid throwing good money after bad.