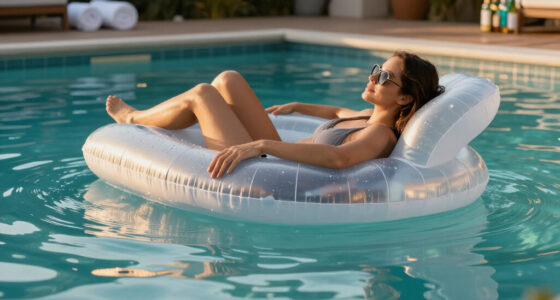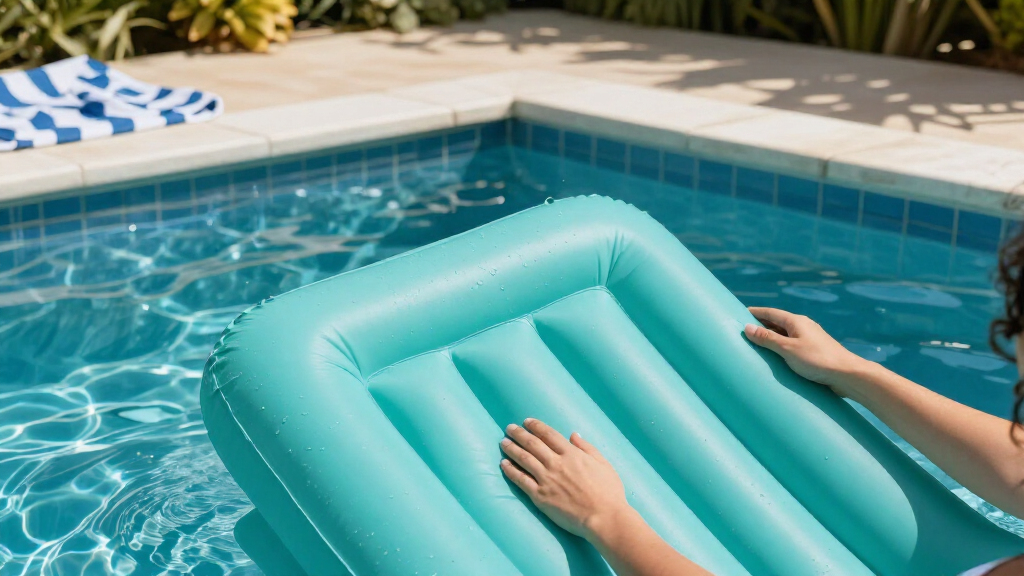
Prepare and use an inflatable pool lounger by checking it for damage, inflating it to the right firmness, and testing it in shallow water before relaxing on it. This guide is for first-time users and anyone who wants a straightforward setup and care routine. Allow about 15-30 minutes, depending on the lounger and whether you need to find a pump or repair a small leak.

Get pool and patio gear delivered free with Prime
- Fast, free delivery on millions of items
- Prime Video, Amazon Music and more included
- Member-only deals all year

Jasonwell Inflatable Pool Float Lounge – Adult Floating Lounger
- ✔ Brand: Jasonwell
- ✔ Model: JX-CPLF-180C2
- ✔ Dimensions: 71 x 31 inches

INTEX Inflatable Floating Pool Recliner Lounge Chair for Adults
- ✔ Brand: Intex
- ✔ Model: 58868EP
- ✔ Dimensions: 71 x 53 inches
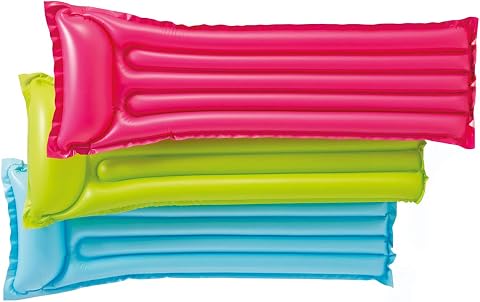
Intex Relax-a-Mat Pool Float, Set of 2
- ✔ Brand: Intex
- ✔ Product type: Flotation mats
- ✔ Quantity: 2 mats
Difficulty: Beginner | Time: 15-30 minutes
What You’ll Need
Tools & Materials:
- Inflatable pool lounger
- Air pump compatible with the lounger valve, if needed
- Manufacturer’s instructions or care label
- Clean, level surface for inflation
Knowledge:
- Basic ability to operate the pump and close the air valve
Check the lounger’s label for weight limits, age guidance, inflation instructions, and any restrictions on pool use. A pool lounger is a flotation toy, not a life-saving device. Children and anyone who cannot swim need close, capable adult supervision.
Jasonwell Inflatable Pool Float Lounge – Adult Floating Lounger
The Jasonwell is our best overall inflatable pool lounger because it combines a relaxed, elongated shape with practical support features. Its 71-by-31-inch profile gives an adult room to recline, while the supportive headrest makes it more purpose-built for lounging than a plain flotation mat. Ventilation is intended to help keep the user cool, a useful distinction when staying on the water for longer stretches.Compared with the INTEX recliner, Jasonwell favors a lower, narrower lounging position over an upright seat with armrests and cup holders. Its pad eyes also let users connect multiple floats, which neither other listing mentions. Dual air chambers and a contoured shape are intended to improve stability, though the description does not provide a specific stability rating. At 200 pounds capacity, its stated limit is lower than the recliner’s 220 pounds.The tradeoff is the setup and footprint: two air chambers can take longer to inflate, and the full-size float may be awkward to carry or store. The listing includes two units, which makes the set more useful for couples or households than a single recliner. We’d choose it when head and body support matter more than sitting upright, while checking the capacity against the intended user.
Pros:
- Supportive headrest and contoured shape suit relaxed reclining.
- Ventilation design is intended to help keep the user cool.
- Pad eyes allow multiple floats to be connected.
- Two air chambers and a two-unit count add stability features and sharing value.
Cons:
- The 71-by-31-inch size may be cumbersome to transport and store.
- Two chambers can mean longer inflation and deflation setup.
Best for: Adults seeking a supported, ventilated lounging float, especially households that want two units or the option to connect floats.
Not ideal for: Those who want an upright chair with armrests and cup holders, need a higher stated capacity, or have limited storage space.
Bottom line: Choose Jasonwell for the most balanced combination of reclining support, ventilation and group-friendly details, provided its 200-pound capacity fits.
“Choose Jasonwell for the most balanced combination of reclining support, ventilation and group-friendly details, provided its 200-pound capacity fits.”
INTEX Inflatable Floating Pool Recliner Lounge Chair for Adults
When pool lounging means sitting back rather than lying flat, the INTEX Floating Pool Recliner is the clearest match. Its contoured backrest and armrests give it a chair-like format, and built-in cup holders keep a drink close without requiring the user to balance it on a flat mat. Heavy-duty handles are another practical touch when moving a large float around the pool.Compared with Jasonwell, this INTEX model is substantially wider at 53 inches and has a higher stated capacity of 220 pounds. It is also listed as a single unit, while Jasonwell includes two. Its dual air chambers are a useful design feature, but the product description does not say how they affect stability in use. Against the Relax-a-Mat, the recliner offers a much clearer adult-oriented support setup, though it occupies far more space.That generous 71-by-53-inch footprint is the central compromise: it may be awkward to store, transport and maneuver in a crowded pool. The listing also calls for manual inflation with a pump, and it specifies no warranty. We’d place it ahead of a basic mat for someone who values a supported seated position, but below Jasonwell overall because it is more specialized and bulkier.
Pros:
- Contoured backrest and armrests create a chair-like lounging position.
- Cup holders add convenience while seated.
- 220-pound stated capacity is higher than Jasonwell’s.
- Dual air chambers and transport handles are included.
Cons:
- The 71-by-53-inch footprint can be bulky to store and move.
- Manual inflation takes time, and the listing specifies no warranty.
Best for: Adults who want an upright, supported pool seat with armrests and cup holders and whose weight is within the 220-pound stated limit.
Not ideal for: Buyers with limited storage, anyone wanting a compact flat lounger, or those who prioritize a two-float set or a stated warranty.
Bottom line: Pick the INTEX recliner when seated comfort and cup holders matter more than a compact footprint or a second float.
“Pick the INTEX recliner when seated comfort and cup holders matter more than a compact footprint or a second float.”
Intex Relax-a-Mat Pool Float, Set of 2
The Relax-a-Mat is the least elaborate option here: the set supplies two vinyl flotation mats, each measuring 72 by 27 inches. That familiar, flat shape asks less of the buyer than choosing between a headrest-equipped lounger and an inflatable chair. It can suit someone who mainly wants a simple surface to float on, with an extra mat available for another person.Compared with Jasonwell, these mats are slightly longer but narrower, and the listing does not describe a headrest, ventilation, connecting points or dual chambers. That means fewer stated comfort and stability features for reclining. Compared with the INTEX recliner, the mat format is less chair-like and has no listed armrests or cup holders, but its two-unit count may better suit sharing. The color is assorted, so the exact appearance may vary.The decisive concern is its supplied maximum weight capacity of 15 pounds. That figure conflicts with the description saying the mats are suitable for teens and adults; we cannot resolve the discrepancy from the provided information. Until the manufacturer or seller confirms the correct limit, we would not rely on this listing for adult use. Its simple format may otherwise appeal to buyers, but clear capacity information is more important than the convenience of receiving two mats.
Pros:
- Includes two mats for sharing.
- Long 72-inch format provides room to recline.
- Vinyl construction is specified.
- Simple flat design avoids a chair-style configuration.
Cons:
- The listed 15-pound maximum capacity conflicts with the adult-use description.
- No headrest, armrests, cup holders or stability features are specified.
Best for: Buyers looking for a basic two-mat format who can first confirm the correct weight capacity for the intended users.
Not ideal for: Adults who need a clearly specified adult weight limit or want head support, a recliner back, armrests or other listed comfort features.
Bottom line: Consider this two-mat set only after verifying its capacity, since the supplied 15-pound limit leaves adult suitability unclear.
“Consider this two-mat set only after verifying its capacity, since the supplied 15-pound limit leaves adult suitability unclear.”
As an Amazon Associate we earn from qualifying purchases.
Before You Start
Keep the lounger away from sharp edges, rough concrete, hot surfaces, and open flames. Do not use it in open water, near drains, or where wind or currents can carry it away. If the manufacturer says not to use an electric pump, follow that instruction. Never inflate the lounger with your mouth if doing so causes discomfort or conflicts with the product instructions.
Choose a calm area of the pool with enough room to move and get off the lounger. Keep the pool ladder or steps accessible. Do not use the lounger as a substitute for swimming ability, a life jacket, or active supervision.
Step-by-Step Instructions
Step 1: Read the label and inspect the lounger
Spread the lounger on a clean, level surface and read its instructions. Check the seams, valve, handles, and body for cracks, punctures, peeling material, or damage. Confirm the stated weight limit and any age or use restrictions before anyone gets on.
Tip:Do not inflate or use a lounger with a split seam, damaged valve, or a patch that is lifting. Follow the maker’s repair guidance or replace it.
Check: The lounger is intact, its instructions are available, and its limits fit the intended user.
Step 2: Position the lounger for inflation
Place the lounger away from walls, pool edges, furniture, and debris. Unfold it fully so no section is trapped under another part. Find the inflation valve and identify the pump nozzle that fits it.
Tip:Keep the valve area clean. Sand or grit caught inside can interfere with the seal and cause air loss.
Check: The lounger lies flat, the valve is accessible, and the inflation area is clear of sharp objects.
Step 3: Inflate the lounger gradually
Open the valve as directed and attach the compatible pump nozzle. Add air in short bursts, checking the lounger’s shape and firmness as you go. Stop at the firmness specified by the manufacturer, then remove the nozzle and close the valve completely.
Tip:Do not overinflate. Air expands in heat, and excessive pressure can strain seams or cause a burst. Avoid using a high-pressure compressor unless the instructions explicitly allow it.
Check: The lounger has an even shape, feels supportive without being rock-hard, and the closed valve does not leak air.
Step 4: Check for leaks and allow for settling
Leave the inflated lounger on the ground for several minutes. Listen near the valve and seams for escaping air, and look for any area that collapses. If needed, apply a small amount of soapy water around the valve and seams; growing bubbles can indicate a leak. Rinse off the soap and dry the lounger before pool use.
Tip:A newly inflated lounger may soften slightly as its material stretches. Add only enough air to restore the instructed firmness, and recheck after it rests.
Check: The lounger retains its shape, and no escaping air or growing soap bubbles appear.
Step 5: Enter the pool and test the lounger
Carry the lounger to a calm, shallow area. Enter the water using the pool steps or another safe entry point, then place the lounger on the water. Hold its side and test how it floats before climbing on. Get off if it tips, sinks unusually low, or feels unstable.
Tip:Keep the lounger away from pool drains, skimmers, ladders, and crowded areas. Do not tie it to a person or secure it across a path.
Check: The lounger floats evenly in calm water and remains clear of pool equipment and other swimmers.
Step 6: Get on, relax, and get off carefully
Use the method described by the maker to get onto the lounger. Move slowly and keep your weight centered; sudden shifts can turn it over. Stay within the weight limit, keep your face clear of the water, and remain where a supervising adult can see you. To get off, move to the side, hold the pool edge or steps, and enter the water in a controlled way.
Tip:Do not stand, jump, or dive from the lounger. Stop using it if the water becomes rough, the lounger loses firmness, or the user feels unwell.
Check: The user can remain balanced, breathe freely, and get off without pushing into another swimmer or pool fixture.
Step 7: Dry, deflate, and store the lounger
After use, take the lounger out of the pool and rinse away chlorine, salt, or dirt with clean water. Let it dry fully in a shaded, ventilated place. Open the valve and release air gradually, folding the lounger loosely rather than forcing sharp creases. Store it dry in a cool place away from pets, pests, and sharp objects.
Tip:Do not pack a damp lounger into a sealed container; trapped moisture can encourage mildew and damage the material.
Check: The lounger is clean, fully dry, deflated without strain, and stored where it will not be punctured or overheated.
Common Mistakes to Avoid
- Inflating until the lounger feels completely rigid. — Stop at the firmness specified by the maker and leave room for air expansion in hot weather.
- Using a pump nozzle that does not fit the valve. — Check the valve type and use a compatible nozzle; forcing a poor fit can damage the valve or let air escape.
- Treating the lounger as a flotation safety device. — Use it only for relaxation, follow pool rules, and provide active supervision for children and non-swimmers.
- Folding or storing the lounger while it is wet. — Rinse it after use and dry it completely in a shaded, ventilated spot before storage.
Troubleshooting
Problem: The lounger loses air soon after inflation.
Solution: Check that the valve is fully closed and clear of grit. Inspect the valve and seams for damage. Use the maker’s approved patch kit for a small puncture, and replace the lounger if a seam or valve is badly damaged.
Problem: The pump nozzle will not stay in the valve.
Solution: Stop rather than forcing it. Try the correct adapter or a pump designed for that valve. Check the instructions for the recommended inflation method.
Problem: The lounger feels soft after sitting in the sun.
Solution: Move it to shade and check its firmness again. Heat can expand the air and later cooling can reduce pressure. Add a small amount of air only if the maker’s instructions call for it.
Problem: The lounger tips or feels unstable in the pool.
Solution: Get off in a controlled way and return it to shore. Check inflation, balance, and the water conditions. Do not use it if it remains unstable or is damaged.
What Success Looks Like
The lounger is undamaged, inflated to the maker’s recommended firmness, and holds air during a ground check. In calm water it floats evenly, stays clear of pool equipment, and supports the user within its stated limits. After use, it is rinsed, fully dried, deflated without creasing strain, and stored safely.
Next Steps
Before each use, repeat a quick inspection of the valve, seams, and surface, and check firmness after the lounger has warmed in the sun. Follow the product’s cleaning and repair instructions. Replace it if a repair will not hold or if the material, valve, or seams show ongoing damage.
Frequently Asked Questions
How firm should an inflatable pool lounger be?
Follow the manufacturer’s instructions. In general, inflate it until it holds its intended shape and feels supportive, but not rigid. Do not exceed the stated inflation guidance.
Can I use an electric pump to inflate a pool lounger?
Only if the product instructions allow it and you have a compatible nozzle. Use controlled, low-pressure inflation; a high-pressure pump or compressor can damage the lounger.
Can children use a pool lounger?
Check the product’s age and weight guidance. A lounger is not a life-saving device, so children need close, active supervision from an adult, even in shallow water.
How do I find a small leak?
Listen around the valve and seams. You can also apply a little soapy water to those areas and watch for bubbles that grow. Rinse and dry the lounger before using it again.
Can I leave the lounger inflated between uses?
Follow the maker’s storage guidance. If you leave it inflated, keep it out of direct heat and away from sharp objects, and check its condition and firmness before the next use.