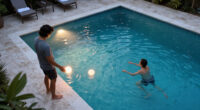
This guide shows pool owners and caregivers how to prepare floating LED pool lights, test them, place them in the water, and put them away after use. The task is beginner-friendly and usually takes 20-40 minutes, not counting any charging time. You will finish with lights that float and illuminate as intended, with cords and electrical connections kept away from the pool.

Get pool and patio gear delivered free with Prime
- Fast, free delivery on millions of items
- Prime Video, Amazon Music and more included
- Member-only deals all year
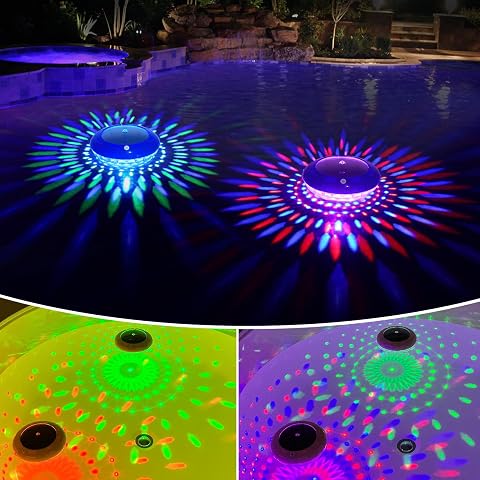
FirstE Solar Floating Pool Lights – RGB Color Changing, IP68 Waterproof, Hangable for Above & In-Ground Pools, Wedding & Party De…
- ✔ Lights included: 2
- ✔ Power: Solar
- ✔ Colors and modes: 7 colors; 9 lighting modes

Floating Pool Lights with Remote – 6.5" RGB Color Changing Solar Light, IP68 Waterproof, Hangable for Pools and Gardens
- ✔ Size: 6.5 inches
- ✔ Power: Solar
- ✔ Brightness: 1500 lumens listed

Floating Pool Lights with Remote, 6.5" Upper & Lower Dynamic LED Color Changing Solar Lights, IP68 Waterproof for Inground Pools…
- ✔ Dimensions: 6.5 inches deep × 7 inches wide × 3 inches high
- ✔ Weight: 13.76 ounces
- ✔ Power: Solar
Difficulty: Beginner | Time: 20-40 minutes, plus charging time if required
What You’ll Need
Tools & Materials:
- Floating LED pool lights and their manufacturer instructions
- Fresh batteries or the supplied charging cable, depending on the model
- A clean, dry cloth
- A basin or dry work surface for testing
- Optional: a soft pool brush or cloth for cleaning the waterline
Knowledge:
- Basic familiarity with pool safety rules
- Ability to identify the lights’ battery compartment, switch, and charging port
Check the product label and manual before putting a light in water. Do not assume that a light is waterproof because it floats; some models are splash-resistant only. Keep mains-powered chargers, outlets, and extension cords well away from the pool, and never charge a light while it is wet or in the water. Allow 20-40 minutes for setup and testing; rechargeable models may need several hours to charge before use.
FirstE Solar Floating Pool Lights – RGB Color Changing, IP68 Waterproof, Hangable for Above & In-Ground Pools, Wedding & Party De…
For shoppers who want decorative light distributed across a pool rather than one floating focal point, FirstE’s two-light set is the most balanced choice here. Its combination of seven colors, nine lighting modes, solar charging, and a stated runtime of up to 10 hours each night makes it easier to plan a gathering than with options that omit a runtime figure. The built-in hook also gives us another use: hang a light near a pond or fountain when we are not using it in the pool.The tradeoff is control and certainty about brightness. FirstE uses a push button rather than a remote, so changing modes may require handling the light; the B0DSC7LBQY is more convenient for adjusting effects from a distance. FirstE does not provide a brightness measurement, either, so we should not assume the pair will adequately illuminate a large pool. Its instructions also describe an initial activation period that may require up to three days, while regular full charging is listed as 8–10 hours of direct sun. That makes it less appealing for buyers who want to unpack and use lights immediately.We place FirstE first because a pair and a stated nightly duration answer two useful buying questions better than the other listings do. It remains ambience lighting, not a safety light, and its solar-powered convenience depends on access to strong sun.
Pros:
- Includes two floating LED lights for broader decorative coverage than the single-light options.
- Lists up to 10 hours of illumination per night after charging.
- Offers seven colors and nine lighting modes.
- Built-in hook supports hanging as well as floating use.
Cons:
- Push-button control is less convenient than the remotes included with the other two options.
- Brightness is not specified, making suitability for large pools difficult to judge.
- Initial battery activation may take up to three days, according to the product description.
Best for: Buyers who want two solar-powered lights to spread color around a pool or decorate a pond, fountain, or event space.
Not ideal for: Shoppers who need remote adjustments, a published brightness level, or dependable lighting after several cloudy days.
Bottom line: Choose FirstE when a two-light layout and stated long-night runtime matter more than remote control or a documented brightness figure.
“Choose FirstE when a two-light layout and stated long-night runtime matter more than remote control or a documented brightness figure.”
Floating Pool Lights with Remote – 6.5" RGB Color Changing Solar Light, IP68 Waterproof, Hangable for Pools and Gardens
This 6.5-inch RGB floating light is the strongest fit for buyers who want to change the look of the water without reaching for the fixture. Its remote and push-button controls offer a more flexible experience than FirstE’s push-button-only design, and the listed 1500-lumen output gives us a brightness reference that is missing from both competitors. The product description says the remote offers 16 modes, while the specifications list nine dynamic modes, so buyers should treat the exact mode count as unclear rather than assume every listed count applies in the same way.Compared with FirstE, this model prioritizes individual control and a stated light output over having two lights and a specified up-to-10-hour runtime. It is listed as one LED light source, so it is a better match for a color-changing centerpiece than for evenly distributing light around a broad pool. Solar power means no cord or battery changes, but the product calls for 8–10 hours of sunlight and warns that cloudy conditions can reduce performance. Because no runtime is supplied, we cannot confidently recommend it for buyers who need a predictable full evening of use.Built-in loops allow hanging or tethering, adding placement options beyond floating. That is useful for keeping a decorative light near a chosen area, but it does not change its role: this is a remotely controlled accent light, not a replacement for fixed pool illumination. Choose it over the dual-layer model if a clear brightness claim and straightforward remote adjustment matter more than a layered display.
Pros:
- Remote and push-button controls allow color and effect changes without relying only on manual cycling.
- Lists 1500 lumens, providing a brightness specification absent from the other options.
- Solar powered, with no batteries or power cord required.
- Built-in loops allow hanging or tethering in addition to floating.
Cons:
- The listing describes one light source, so pool-wide coverage may require additional lights.
- Runtime is not specified, and performance may fall when sunlight is limited.
- The listed mode counts differ between the specifications and product description.
Best for: Buyers who prefer one remotely controlled floating light and value a stated brightness figure when comparing options.
Not ideal for: Anyone seeking a multi-light kit, a documented all-night runtime, or consistent output through cloudy weather.
Bottom line: Pick this model when remote adjustment and a stated 1500-lumen output outweigh the appeal of a two-light set or a dual-layer display.
“Pick this model when remote adjustment and a stated 1500-lumen output outweigh the appeal of a two-light set or a dual-layer display.”
Floating Pool Lights with Remote, 6.5" Upper & Lower Dynamic LED Color Changing Solar Lights, IP68 Waterproof for Inground Pools…
Choose this model when the visual effect matters more than getting a simple, well-documented pool light. Its defining feature is a dual-layer LED display, with upper and lower dynamic color effects that give it a different look from the single-source B0DSC7LBQY. Remote and push-button controls are both listed, while the operating-temperature range of 14°F to 122°F gives buyers more environmental information than the other listings provide. It also avoids cords and replaceable batteries by charging from sunlight.That added display does not make it the easiest option for every setup. The remote can control only a limited number of lights at once, which may frustrate buyers planning a synchronized group. FirstE is a more straightforward choice for a two-light arrangement because its set includes two lights and lists a nightly runtime; this model is better understood as a single decorative feature, with no runtime or charging-duration figure provided in the supplied specifications. Its instructions also say the light must be activated by pressing the button in darkness, an extra setup detail that may catch out someone expecting it to begin operating automatically.We rank it third not because the layered effect lacks appeal, but because its use case is narrower and several practical details are missing. Select it for distinctive top-and-bottom color movement; skip it if the priority is predictable runtime, a straightforward multi-light remote setup, or an explicit brightness measurement.
Pros:
- Dual-layer LED design creates a more distinctive effect than the single-source model.
- Includes both remote and push-button controls.
- Solar powered, so it does not require a cord or replaceable batteries.
- Lists an operating range of 14°F to 122°F.
Cons:
- Remote control can operate only a limited number of lights at once.
- The supplied details do not state brightness, charging duration, or runtime.
- Initial activation requires pressing the button in darkness.
Best for: Buyers who want a visually layered floating accent light for an inground pool or decorative event and are comfortable with extra setup details.
Not ideal for: Shoppers who need a stated runtime, a known brightness level, or remote control across a larger coordinated group.
Bottom line: Choose this light for its upper-and-lower display, not for the most predictable runtime or the simplest multi-light control.
“Choose this light for its upper-and-lower display, not for the most predictable runtime or the simplest multi-light control.”
As an Amazon Associate we earn from qualifying purchases.
Before You Start
Read the water-use rating and operating instructions for your exact model. Use only lights explicitly rated for immersion in a pool, and follow any stated depth, temperature, or chemical restrictions. Do not use a light with a cracked shell, loose seal, corroded battery contacts, or damaged charging cable. Keep children supervised around the pool; floating lights are decorations, not safety markers or flotation devices. If the product uses a tether, follow its instructions and keep it positioned so it cannot become a trip or entanglement hazard.
Step-by-Step Instructions
Step 1: Check the pool and light instructions
Confirm that the pool is ready for use and that the light is permitted in your pool type and water conditions. Read the instructions for battery type, switch operation, permitted water depth, and chemical compatibility. Check whether the light is intended for temporary use or can remain in the water. Remove the light from service if its housing or seal is damaged.
Tip: Some lights are designed for pools, while others are only suitable for a bath or a dry decorative display. Use the product’s stated rating rather than its appearance to judge where it can go.
Check: You have confirmed that the model is rated for the intended pool and know how to switch it on and off.
Step 2: Prepare the batteries or charge the light
For a battery-powered light, open the battery compartment only in a dry area and install the specified batteries in the marked direction. For a rechargeable model, dry the light fully, connect the supplied charger as instructed, and charge it away from the pool. Disconnect the charger before taking the light outdoors or near water. Close the compartment or port cover firmly, following the manufacturer’s directions.
Tip: Do not mix old and new batteries or different battery types. Never charge a light with moisture on its charging contacts, and do not substitute an unapproved charger.
Check: The batteries are fitted correctly or charging is complete, and every compartment cover and seal is seated as directed.
Step 3: Inspect and clean the light
Wipe the exterior with a clean, dry cloth. Look over the lens, housing, gasket, battery cover, and any charging-port plug. Remove grit or hair that could interfere with a seal. Do not use abrasive pads, solvents, or cleaners unless the product manual permits them. If the seal is missing, pinched, dirty, or split, do not put the light in the pool.
Tip: A small amount of debris at a sealing surface can let water enter the housing. Keep the compartment open only as long as needed in a dry place.
Check: The exterior is clean, the housing is intact, and the cover or plug sits evenly without visible gaps.
Step 4: Test the controls in a dry area
Place the light on a dry surface and use its switch or remote control to cycle through the available modes. Check that the LEDs illuminate and that the color or brightness changes as expected. Test the remote at the distance and angle described in the instructions. Turn the light off before placing it in the water if the manual calls for that sequence.
Tip: If the light does not respond, check battery orientation, charge level, and any pull tab or transport lock before assuming the unit is defective.
Check: The light responds to its controls and produces steady illumination without flickering or unexpected shutoff.
Step 5: Choose a safe placement area
Move loose toys and other objects away from the water, then choose an open area where the light can float without blocking steps, ladders, drains, or the pool’s main swimming path. Keep it clear of skimmers and water returns that may draw it against an opening or repeatedly push it into a wall. For multiple lights, spread them apart so swimmers can move freely.
Tip: Do not place lights where swimmers may mistake them for lane markers, steps, or rescue equipment. Follow any manufacturer limits on the number of lights used together.
Check: The selected area is clear of obstructions and does not interfere with pool access, circulation openings, or swimming.
Step 6: Place the light in the water
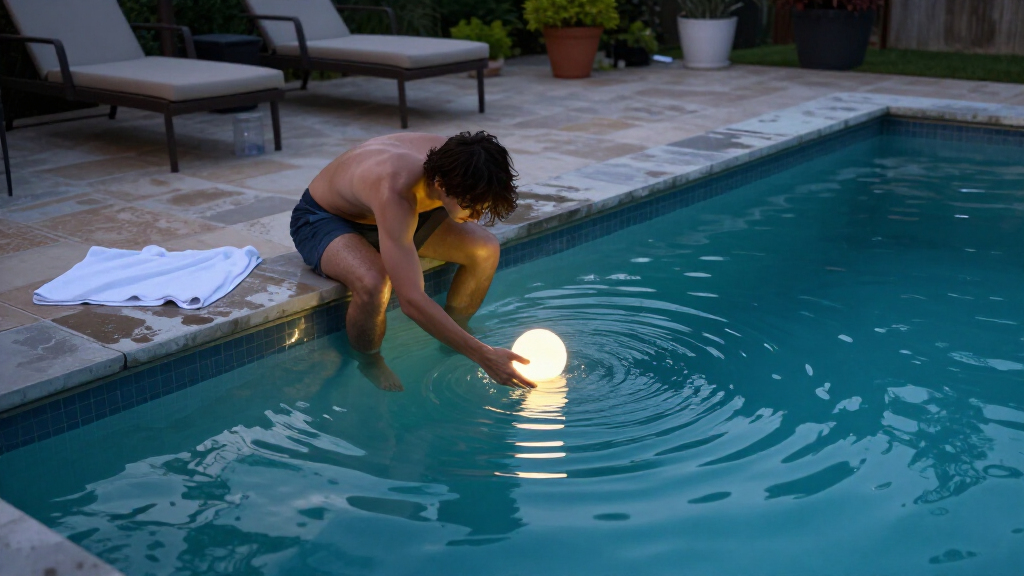
With the light’s covers closed and the charger disconnected, lower it gently onto the water rather than throwing it. Switch it on using the method specified by the manufacturer. Watch it for several minutes as it settles and moves with the water. If it has a tether, attach or position it only as directed, and keep the tether out of walking areas and away from swimmers.
Tip: Do not force a light underwater unless its instructions say it can be submerged. A floating model may be designed to stay at the surface, not operate at depth.
Check: The light remains upright or in its intended floating position, stays illuminated, and does not take on water or drift into a hazardous area.
Step 7: Check operation during use
Confirm that the light remains visible from the poolside and that it does not interfere with swimmers or pool equipment. Keep a responsible adult supervising the pool; do not use the light as a substitute for proper pool lighting or active supervision. If the light begins to flicker, tilt, sink, or behave unusually, remove it from the water and inspect it on a dry surface.
Tip: Water movement, wind, and circulation can change where a floating light travels. Reposition it only when it is safe to do so and without entering the pool to retrieve it if the pool is unattended.
Check: The light stays in its intended operating position and remains a decorative addition rather than an obstruction.
Step 8: Remove, dry, and store the light
When finished, switch the light off and lift it out by its housing, not by a charging cable or tether unless the manual identifies that part as a handle. Dry the exterior before opening a battery compartment or charging port. Rinse off pool residue only if the manufacturer allows it, then dry the light completely. Remove disposable batteries for long-term storage if the instructions recommend it, and store the unit in a cool, dry place away from direct sun.
Tip: Do not put a wet light on its charger or seal moisture inside a storage container. Check and clean the seal before the next use.
Check: The light is switched off, dry, undamaged, and stored with its charger or batteries according to the product instructions.
Common Mistakes to Avoid
- Putting a splash-resistant or decorative-only light in the pool. — Check the product label and manual for a clear immersion rating before use. If the rating is unclear, keep the light out of the water and ask the manufacturer.
- Opening a battery compartment or charging port while the light is wet. — Remove the light, dry its exterior and hands fully, and work on a dry surface before opening it or connecting a charger.
- Letting the light drift against a skimmer, return, ladder, or crowded swimming area. — Choose an open placement area, observe the light after release, and reposition it if circulation or wind carries it toward an obstruction.
- Treating decorative lights as a replacement for pool lighting or supervision. — Keep required pool lighting operating and maintain active adult supervision. Do not rely on a floating light to mark hazards or protect swimmers.
Troubleshooting
Problem: The light does not turn on.
Solution:
Remove it from the water if already placed there. Check for a transport tab, switch sequence, remote battery, correct battery orientation, or incomplete charge. Inspect contacts for corrosion or moisture. Replace batteries only with the specified type; stop using the light if the compartment or seal is damaged.
Problem: The light flickers, changes brightness unexpectedly, or switches off.
Solution:
Take it out and dry it. Check the charge or batteries and confirm that the cover is fully seated. If moisture is visible inside the lens or compartment, do not recharge or reuse it; contact the manufacturer for guidance. Replace a unit with a damaged seal rather than trying to seal it with household glue.
Problem: The light sinks, tips over, or will not float steadily.
Solution:
Remove it promptly and inspect the housing for cracks, a loose cap, or water inside. Confirm that all parts are assembled as directed and that the model is designed to float in pool water. Do not add improvised weights or open the sealed body to repair it.
Problem: The light drifts into pool equipment or does not stay where placed.
Solution:
Move it to an area with less current and farther from skimmers and returns. Use only a manufacturer-approved tether or positioning method, and keep any line clear of swimmers, ladders, and walking routes. Remove the light if you cannot keep it clear of hazards.
What Success Looks Like
The setup is complete when the light is rated for pool immersion, its housing and seals are intact, its controls work, and it floats in the intended position without flickering, sinking, or obstructing swimmers or pool equipment. After use, it should be switched off, dried before charging or opening, and stored according to its instructions.
Next Steps
Before each use, inspect the housing, gasket, and port cover, then check the battery or charge level. Clean off residue using only approved methods and replace worn seals or damaged lights rather than improvising a repair. Store the unit indoors when it is not in use, especially during storms, freezing weather, or pool maintenance. If water enters the housing or the light repeatedly fails, stop using it and contact the manufacturer or replace it.
Frequently Asked Questions
Can I leave floating LED pool lights in the water overnight?
Only if the manufacturer says the model can remain in the pool and the conditions match its instructions. Otherwise, switch it off, remove it after use, and store it dry. Take it out during storms or when pool maintenance is underway.
Are floating LED pool lights safe for children?
They can be used as decorations when the product is rated for the pool and children remain actively supervised. They are not toys, rescue devices, or substitutes for pool barriers, supervision, or approved safety equipment. Keep small battery components away from children.
Can I use a floating LED light in a saltwater pool?
Check the product instructions for saltwater compatibility. Salt can affect materials and seals, and a general waterproof rating does not automatically confirm compatibility. Rinse and dry the light only as its manufacturer directs.
How many floating lights should I use?
Follow the maker’s limit and use only enough lights to create the desired decorative effect without crowding the pool. Keep them away from steps, ladders, drains, skimmers, and swimmers’ paths. Floating lights should not serve as the pool’s required safety lighting.
What should I do if I see water inside the light?
Remove it from the pool, switch it off if you can do so safely, and do not charge or reopen it while wet. Dry the exterior and contact the manufacturer for repair or replacement instructions. Do not return it to the water until the manufacturer confirms it is safe to use.
Fall Picks
fall essentials
As an affiliate, we earn on qualifying purchases.