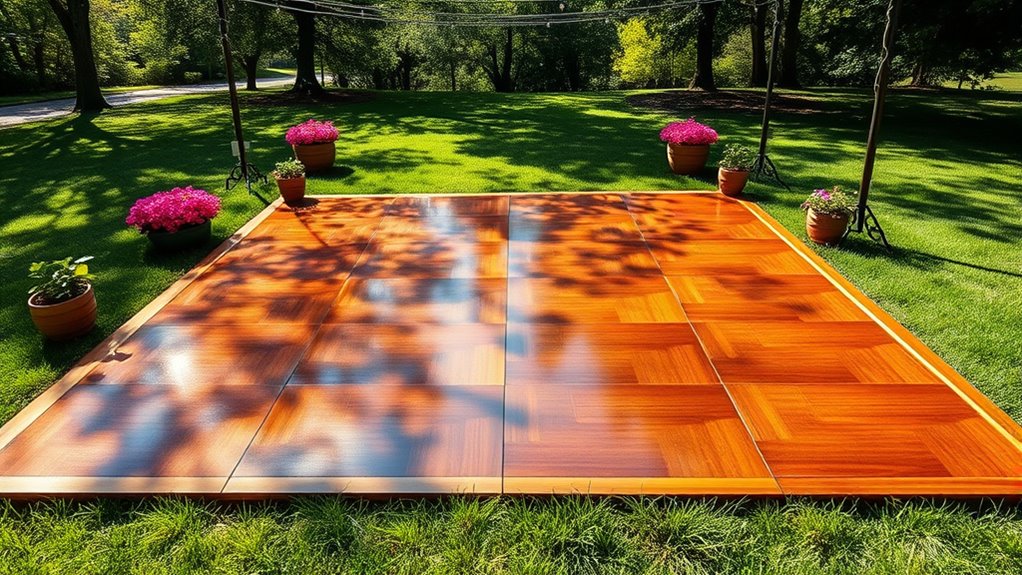

To build a compact outdoor dance floor, start by planning your layout and choosing durable materials like pressure-treated wood or interlocking tiles that resist weather. Prepare the ground by clearing debris, leveling the surface, and ensuring proper drainage for stability. Assemble a sturdy base frame, secure it with weather-resistant fasteners, and install the flooring tightly. For a safe and long-lasting space, focus on stability, slip resistance, and ease of assembly—keep going for detailed tips!
Key Takeaways
- Measure and mark a suitable, level ground area, ensuring extra space for movement and stability.
- Select durable, weather-resistant materials like pressure-treated wood or interlocking tiles for the surface.
- Build a sturdy, properly supported frame with galvanized or treated lumber, ensuring precise measurements and level installation.
- Secure panels with appropriate anchors, clamps, or weights, especially on uneven or grassy surfaces, for stability.
- Regularly inspect, tighten connections, and maintain the surface to ensure safety and longevity of the dance floor.
Planning Your Outdoor Dance Floor Layout and Size
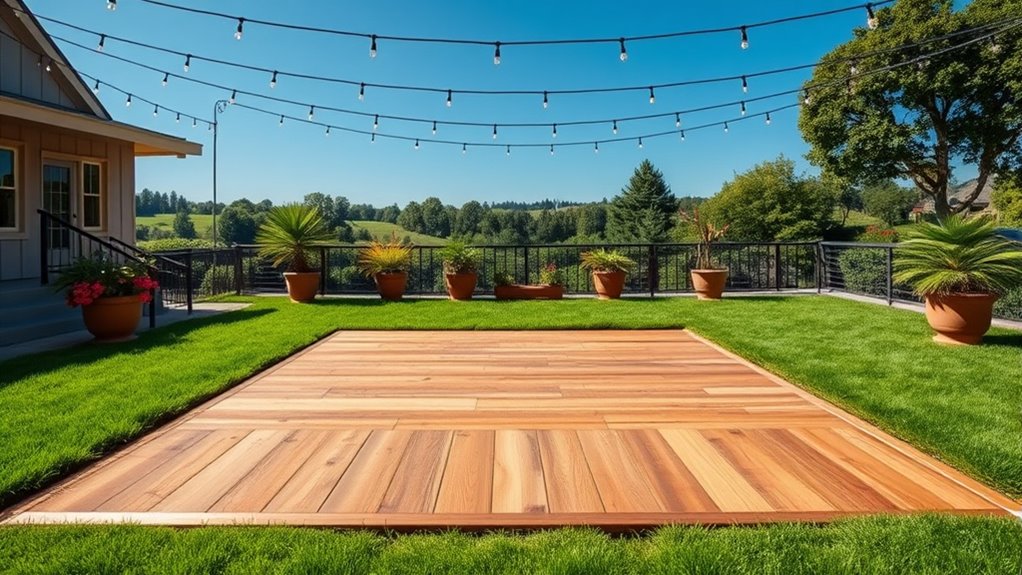
Before you begin laying out your outdoor dance floor, it’s essential to determine the right size and shape for your space. Think about how many people you expect to host regularly and leave some extra room for movement. A standard dance floor for small gatherings is around 12×12 feet, but if you plan larger parties, consider expanding to 15×15 or 20×20 feet. Shape matters too—square or rectangular layouts work well, but you might prefer a circular or irregular shape to fit your yard’s unique features. Measure your available area carefully, marking the boundaries with stakes or spray paint. This step helps you visualize the space and guarantees your dance floor fits comfortably without overwhelming your yard. Additionally, cost considerations can influence your choices, ensuring your outdoor dance floor remains within your budget. To optimize your layout, you should also consider local building codes and permits to avoid any legal issues during installation. Carefully evaluating the available space can help you make adjustments before construction begins. Incorporating sound equipment considerations early on can also improve the overall experience and ensure proper setup.
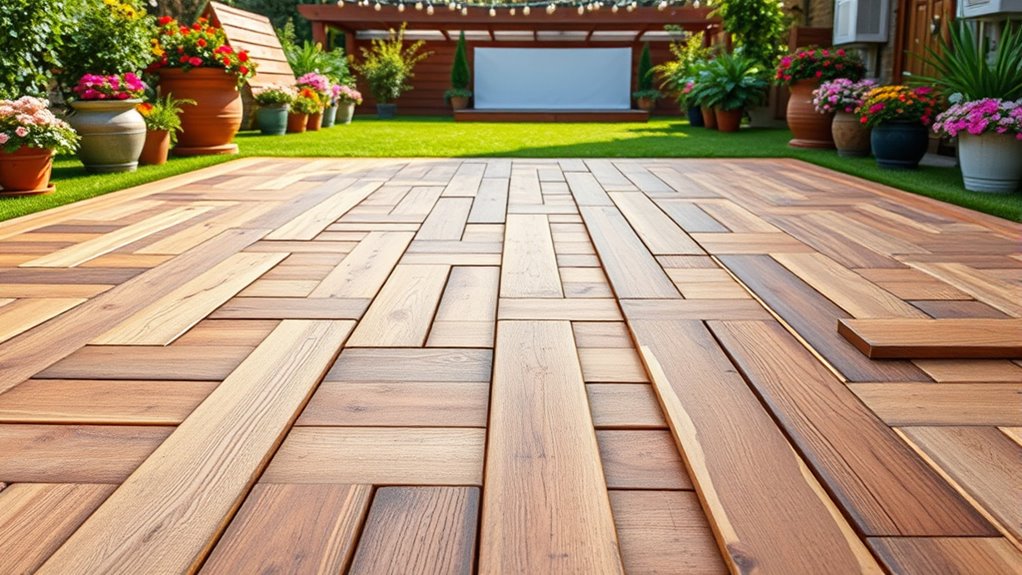
Choosing the Right Materials for Durability and Style
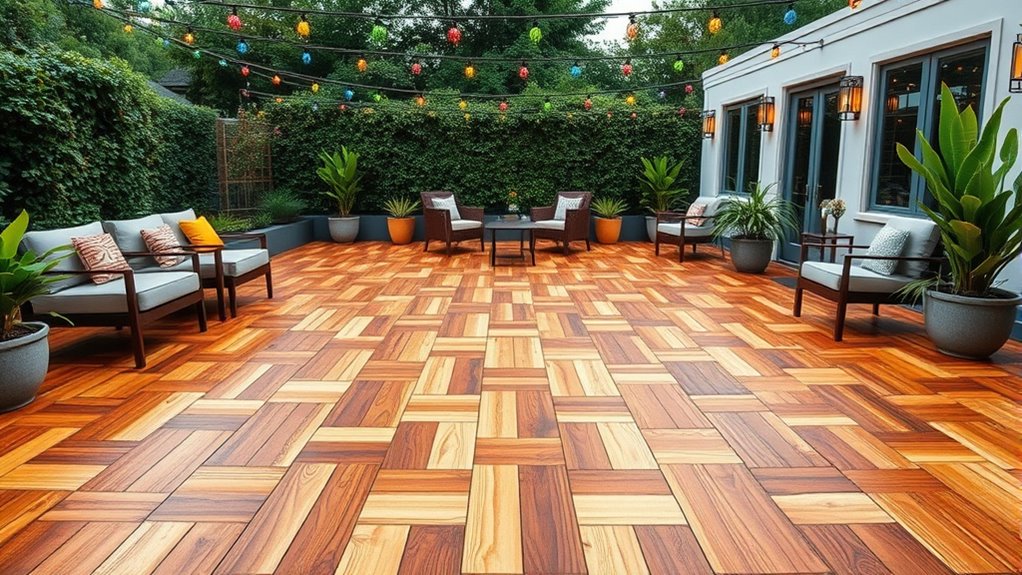
Selecting the right materials for your outdoor dance floor guarantees it’ll stand up to weather and heavy use while matching your style. You want surfaces that resist moisture, sun damage, and temperature changes. Pressure-treated wood or composite decking offers durability and a natural look, while interlocking plastic tiles provide easy maintenance and weather resistance. If you prefer a sleek, modern look, consider rubber flooring or vinyl tiles, which absorb impact and reduce noise. Think about slip resistance too—especially if your area gets rain or dew. Choose colors and textures that complement your outdoor space and reflect your personal style. Investing in quality materials ensures your dance floor remains safe, attractive, and functional for years to come. Additionally, understanding the contrast ratio of your flooring materials can help enhance visibility and safety during evening events. Incorporating proper installation techniques is essential to maximize the longevity and safety of your outdoor dance floor. Using durable materials like rubber or composite decking can further improve the dance floor’s resilience against weather-related wear. To further improve safety and ambiance, integrating lighting options can be beneficial, especially for nighttime gatherings. Moreover, considering aesthetic hooks and wall organization can help keep outdoor spaces tidy and enjoyable for everyone.
Preparing the Ground Surface for Stability
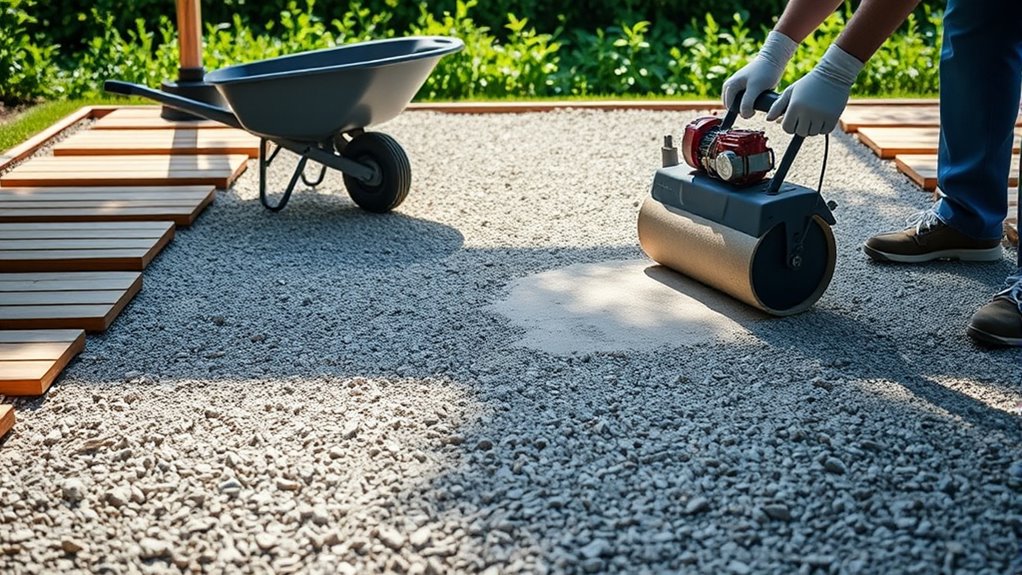
A stable ground surface is essential for building a safe and long-lasting outdoor dance floor. Without proper preparation, the floor can shift, tilt, or crack over time. Start by clearing the area of debris, rocks, and roots. Level the ground using a shovel and rake, ensuring it’s flat and even. Compact the soil with a tamper to prevent shifting. If the soil is soft or uneven, consider adding a layer of gravel or sand for stability. This helps distribute weight evenly and prevents sinking. Proper soil compaction is crucial for maintaining the integrity of the dance floor over time. Additionally, assessing the drainage of the area can prevent water accumulation and erosion that might compromise the foundation. To further enhance stability, implementing proper ground preparation techniques can significantly reduce future issues. Ensuring good soil stability through these methods will help create a durable and safe dance surface. Proper soil testing can also identify specific issues with the ground that need addressing before construction begins. Here’s a quick overview:
| Step | Purpose |
|---|---|
| Clear debris | Prevents uneven surfaces |
| Level and compact soil | Ensures stability and prevents shifting |
| Add gravel or sand | Improves drainage and weight distribution |
Assembling the Base Frame and Support Structure
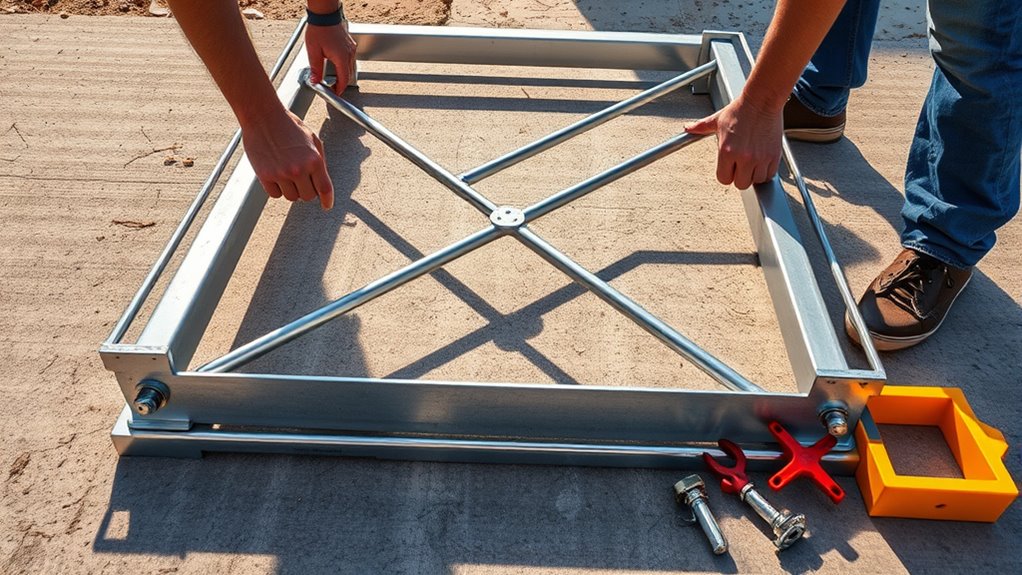
To assemble a sturdy base frame, you need to choose durable materials that can withstand outdoor conditions. Accurate measurements are essential to ensure the structure fits perfectly and remains stable. Make sure your support connections are secure to prevent any movement or wobbling during use. Incorporating weather-resistant materials can help prolong the lifespan of your outdoor dance floor. Additionally, selecting materials that promote flexibility and durability can enhance the safety and longevity of your setup. Using proper fasteners is also crucial for maintaining a strong and reliable support structure over time. Ensuring your materials are appropriate for outdoor use can further improve the overall resilience of your dance floor. Being aware of odor issues related to certain materials can help you choose options that minimize unpleasant smells over time.
Selecting Durable Materials
When building a sturdy outdoor dance floor, choosing the right materials for the base frame and support structure is essential. Opt for weather-resistant options like pressure-treated lumber, aluminum, or galvanized steel. Pressure-treated wood is affordable and easy to work with, offering good durability against moisture and insects. Aluminum is lightweight, corrosion-resistant, and long-lasting, making it ideal for outdoor conditions. Galvanized steel provides strength and resilience, especially for larger or heavier setups. Avoid materials prone to rust or rot, as they can compromise the structure’s integrity over time. Remember, selecting durable materials guarantees your dance floor stays stable, safe, and attractive through various weather conditions, giving you peace of mind and a reliable foundation for outdoor dancing. Additionally, considering maintenance requirements can help prolong the lifespan of your outdoor dance floor and ensure it remains safe for use over time. Incorporating regular inspections into your maintenance routine can further identify potential issues early and preserve the durability of your materials. Proper installation techniques and appropriate anchoring can also enhance stability and safety. Using quality fasteners can prevent loosening or failure of joints, contributing to the overall stability of the structure.
Precise Frame Measurements
Careful measurement is essential for assembling a stable and level outdoor dance floor, as it guarantees all components fit together accurately. Start by measuring and marking the frame dimensions precisely on your materials. Use a tape measure and a square to ensure corners are perfectly 90 degrees. Double-check each measurement before cutting or assembling to prevent errors that could compromise stability. When constructing the support structure, verify the spacing between supports matches your planned layout. Use a level to check the frame’s flatness as you assemble, adjusting as needed. Accurate measurements prevent gaps, wobbling, or uneven surfaces that could cause safety hazards. Taking your time at this stage ensures your dance floor will be sturdy, level, and safe for dancing. Additionally, understanding the importance of precise measurements can help prevent structural issues and enhance the overall safety and durability of your outdoor dance floor. Properly measuring and material selection are key factors in achieving a long-lasting, safe, and enjoyable dance space outdoors. Implementing advanced AI processing power in the design process can also assist in creating more accurate and efficient layouts for your project.
Secure Support Connections
Securing support connections is essential for ensuring your outdoor dance floor remains stable and safe during use. Properly fastening the frame prevents shifting or wobbling, giving dancers a solid surface. Use galvanized steel brackets at each joint, ensuring they are tightly screwed in. Double-check all connections for stability before proceeding. Consider using quick-release clamps for easy adjustments and disassembly. Keep your workspace organized to avoid missing any hardware. Remember, strong support connections mean a longer-lasting, more reliable dance floor.
- Galvanized steel brackets reinforcing corners
- Heavy-duty screws securing frame joints
- Clamps holding sections temporarily
- Leveling shims for even support
- Clear labels for each connection point
Installing the Flooring Surface for Safety and Aesthetics
To create a safe and attractive dance floor, you need to select durable materials that can withstand foot traffic and weather conditions. Make sure the surface is installed level to prevent tripping hazards and ensure smooth dancing. Don’t forget to add safety features like non-slip coatings or edges to safeguard everyone on your outdoor space.
Choosing Durable Materials
Choosing durable materials is essential to guarantee your outdoor dance floor remains safe and attractive over time. Selecting the right material ensures it withstands weather, foot traffic, and daily wear without deteriorating. Consider options like:
- Pressure-treated wood for strong, weather-resistant support
- Interlocking vinyl tiles for easy maintenance and slip resistance
- Composite decking that resists moisture and fading
- Rubber pavers for shock absorption and safety
- Outdoor-grade plywood for affordability and durability
These materials provide a sturdy foundation while adding visual appeal. Picking the right combination depends on your budget, climate, and aesthetic preferences. Prioritize slip resistance, weatherproof qualities, and ease of installation to guarantee your dance floor stays safe, functional, and beautiful for years to come.
Ensuring Level Installation
Achieving a level installation is essential for both safety and visual appeal when setting up your outdoor dance floor. Start by surveying the area with a long level or a string line to identify high and low spots. Remove any debris, rocks, or uneven patches that could cause instability. Use a leveling compound or sand to fill in low areas, and add gravel beneath the foundation if needed for proper drainage and support. Continuously check your work with a level as you lay down the base, adjusting as necessary. Ensuring a flat surface prevents tripping hazards and provides a smooth dancing area. Take your time to verify levelness at every stage, as this foundation influences the entire stability and appearance of your outdoor dance floor.
Incorporating Safety Features
Installing a safe and attractive flooring surface is crucial for preventing accidents and enhancing the overall look of your outdoor dance floor. To guarantee safety, choose materials that provide good traction and cushioning. Consider using textured wood, rubber tiles, or composite decking designed for outdoor use. Proper drainage is also essential to prevent slipping on wet surfaces. Smooth out any uneven spots to avoid tripping hazards. Additionally, add perimeter edging to keep the flooring secure and prevent shifting. Lighting around the dance area can improve visibility at night. Finally, regularly inspect the surface for damage or wear, replacing sections as needed to maintain safety and aesthetics. These features create a safer environment that invites everyone to dance comfortably and confidently.
Securing the Dance Floor for Portability and Longevity

To guarantee your outdoor dance floor remains stable and durable over time, securing it properly is essential. Start by anchoring the panels securely to the ground using stakes or weights, especially if you’ll be setting up on grassy or uneven surfaces. For hard surfaces like concrete or pavement, consider using non-slip mats or adhesive strips to prevent movement. Interlock the panels tightly to minimize gaps and wobbling. You can also add corner braces or clamps for extra stability during use. When transporting the floor, disassemble it carefully, keeping all parts organized. Regularly check the connections and reinforcements to ensure they stay tight. Properly securing your dance floor not only prolongs its lifespan but also keeps it safe and enjoyable for every event.
Frequently Asked Questions
How Do I Ensure Proper Drainage Around the Dance Floor?
To guarantee proper drainage around your outdoor dance floor, you need to plan carefully. You should slope the ground away from the area at about 1-2%, directing water to drainage points or gutters. Installing gravel or a drainage layer underneath helps prevent water pooling. Regularly check for and clear any debris that could block water flow. Proper drainage keeps your dance floor dry, safe, and enjoyable to use.
What Permits or Regulations Are Needed for Outdoor Flooring Installation?
You need to check local permits and regulations before installing outdoor flooring. Contact your city or county building department to find out if you require a permit, especially if the project involves significant structural work or drainage modifications. Make sure your plans adhere to zoning laws, safety codes, and any homeowner association rules. Doing this upfront prevents costly delays and ensures your outdoor flooring project meets all legal requirements.
How Can I Prevent the Floor From Becoming Slippery in Wet Weather?
To prevent your outdoor dance floor from becoming slippery in wet weather, you should choose slip-resistant materials like textured rubber or specialized outdoor tiles. Regularly clean the surface to remove algae, moss, or debris that can cause slipping. Additionally, consider applying a slip-proof coating or sealant designed for outdoor use. Installing drainage solutions and avoiding overly smooth finishes will also help keep your floor safe during rainy days.
What Are the Best Storage Solutions for Portable Dance Floors?
You might worry about space when storing your portable dance floors, but smart solutions can make it easy. Use stackable storage bins or dedicated racks to keep your floors organized and protected from dust and moisture. If space is limited, consider wall-mounted hooks or foldable storage options. These solutions guarantee your dance floors stay in good condition and are ready for your next event without cluttering your space.
How Do I Maintain the Dance Floor’S Appearance Over Time?
To keep your dance floor looking great over time, you should clean it regularly with a gentle mop or vacuum to remove dirt and debris. Avoid harsh chemicals that could damage the surface. When not in use, store it in a cool, dry place or cover it with a protective tarp. Also, inspect for damages and fix small issues promptly to prevent further wear and tear.
Conclusion
Building your outdoor dance floor is like creating a stage for unforgettable moments. With careful planning, the right materials, and secure assembly, you’ll craft a space that’s both beautiful and reliable. Think of it as planting the foundation for countless joyful dances under the open sky. When you finish, you’ll feel proud knowing you’ve built a sturdy, portable spot where memories will twirl and sparkle like stars in the night.