To master underwater photography composition, start with the rule of thirds to create balanced shots and include environmental elements like coral or fish for depth. Use natural lines, such as bubbles or reef edges, to lead the viewer’s eye and frame your subject with rocks or arches. Play with light and shadows for mood, keep backgrounds simple by focusing closely, and experiment with different angles. Keep exploring these techniques to elevate your underwater shots even further.
Key Takeaways
- Use the Rule of Thirds to position subjects and create balanced, engaging compositions underwater.
- Incorporate environmental elements like coral and rocks to frame your subject and add depth.
- Utilize natural light, shadows, and vibrant colors to enhance mood and visual impact.
- Focus tightly on your subject, employing background blur to reduce distractions and emphasize main features.
- Experiment with perspectives and angles—such as low shots or through coral—to add interest and variety to your images.
Understanding the Rule of Thirds in Underwater Settings
Have you ever wondered how to create more balanced and engaging underwater photographs? The rule of thirds is a simple yet powerful tool you can use. Imagine dividing your frame into nine equal sections with two horizontal and two vertical lines. Position your main subject along these lines or at their intersections. This technique naturally guides the viewer’s eye to your focal point and creates a more dynamic composition. Underwater, it helps you avoid placing subjects dead-center, which can feel static. Whether capturing a vibrant fish or a coral reef, applying the rule of thirds adds visual interest and balance. Practicing this technique also helps you develop compositional awareness, making your images more compelling overall. When you understand the importance of visual balance, your underwater shots will look more professional and engaging. Utilizing composition techniques like this encourages creativity and improves your overall photography skills. Practice by visualizing these lines as you compose, and soon it’ll become second nature in your underwater photography. Additionally, understanding asset division strategies can help you plan for future investments in your gear or educational courses, ensuring your long-term growth as a photographer.
Utilizing Leading Lines to Guide the Viewer’s Eye
Leading lines are a powerful composition tool that naturally draw the viewer’s eye through your underwater scene. You can find or create these lines in many ways, such as the curve of a coral branch, a trail of bubbles, or the edges of a reef. Use these lines to lead toward your main subject, like a colorful fish or a vibrant coral formation. Position the lines strategically to create a sense of depth and movement, guiding the viewer’s gaze smoothly through the picture. Avoid clutter that distracts from the lines, and consider how the lines flow within the frame’s composition. When used effectively, leading lines create a dynamic and engaging image that invites viewers to explore every detail underwater. Incorporating visual storytelling techniques can further enhance the impact of your composition and captivate your audience. Paying attention to composition principles, such as balance and focal points, can also help emphasize the leading lines and improve the overall harmony of your shot. Additionally, understanding the power of depth can help you arrange elements to enhance the three-dimensional feel of your photograph. Recognizing the importance of perspective can also help in positioning your camera to maximize the effectiveness of these lines. Utilizing interior design ideas can inspire creative ways to incorporate natural lines and framing within your underwater scenes, making your compositions even more compelling.
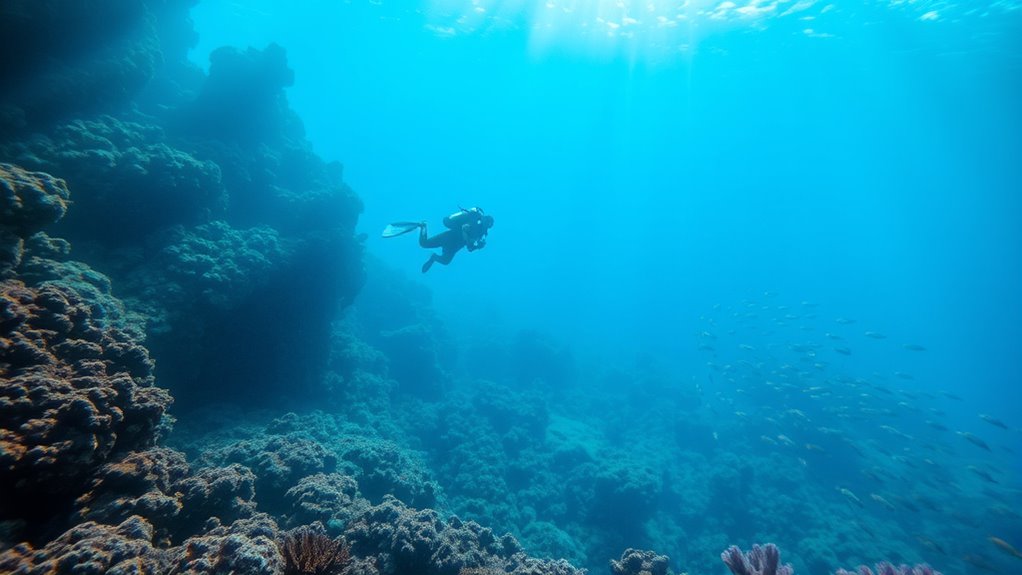
Framing Techniques for Depth and Context

You can create a sense of depth and context by using natural frames like arches, overhanging coral, or rocks to surround your subject. Layering elements in your composition adds visual interest and emphasizes spatial relationships. Including environmental details, such as the surrounding habitat or nearby creatures, helps tell a more complete story. Incorporating principles of the Law of Attraction, such as positive visualization and belief in your skills, can also boost your confidence and creativity in underwater photography. Additionally, understanding AI in Education can inspire innovative teaching methods that enhance your learning process and technical skills. Recognizing the importance of digital distractions and actively reducing screen time can further improve your focus and compositional skills underwater.
Utilizing Natural Frames
Natural frames are a powerful tool in underwater photography, as they draw attention to your subject while adding depth and context to your images. You can use elements like coral branches, arches, overhangs, or school of fish to create these frames. Position yourself so that these natural features surround or partially enclose your subject, guiding the viewer’s eye directly to it. This technique not only emphasizes your subject but also provides a sense of environment, making your photo more immersive. Be mindful of light; natural frames work best when they don’t block essential illumination or create unwanted shadows. Experiment with different angles and compositions to find the most compelling framing. Utilizing natural frames enhances storytelling and transforms simple shots into riveting underwater scenes. Additionally, understanding local ecosystems can help you identify the most visually interesting natural structures to include in your compositions. Being aware of cybersecurity vulnerabilities can also help protect your digital equipment and data while capturing your underwater adventures. Exploring sound healing science in underwater acoustics can even inspire new ways to capture and convey the serene atmosphere of the underwater world. Moreover, paying attention to light conditions can significantly impact the effectiveness of your natural framing techniques, ensuring clarity and vibrancy in your images. Considering environmental factors such as water clarity and current can further improve your framing and overall shot quality.
Layering for Depth
Layering for depth involves arranging elements within your frame to create a sense of three-dimensional space, making your underwater scenes more dynamic and engaging. To achieve this, position foreground, middle ground, and background subjects intentionally. For example, include coral or rocks in the foreground, a fish or diver in the middle, and a distant reef or shadowed area in the background. This technique guides the viewer’s eye through the scene and adds layers of interest. Use natural elements to frame your subjects, such as arches or overhangs, to enhance this effect. Keep your focus sharp on your main subject while allowing other layers to softly fade, emphasizing depth. Effective layering transforms a flat shot into a vibrant, immersive underwater story. Additionally, understanding beauty hours can help you plan your dives during optimal lighting conditions for capturing stunning images. Recognizing composition techniques is essential for creating balanced and captivating underwater photographs. Incorporating visual storytelling principles can further elevate your images by conveying emotion and narrative within the scene. Staying informed about sustainable materials and eco-friendly practices can also help protect underwater environments while capturing beautiful shots. Being aware of popular juice brands and their health benefits can inspire you to stay hydrated during long dives, ensuring optimal performance.
Including Environmental Context
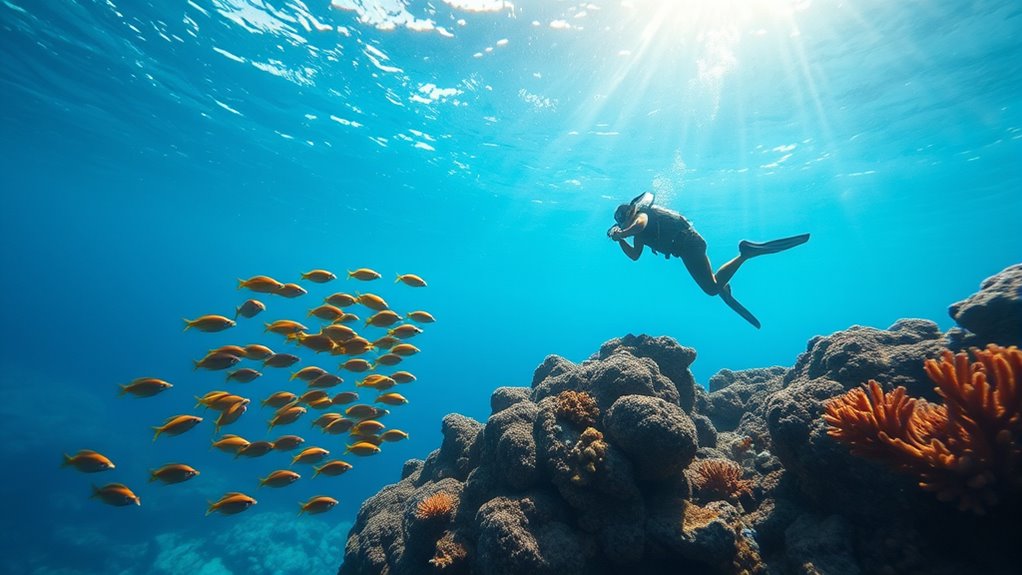
Including environmental context enhances underwater photographs by framing your main subject within its natural surroundings, adding depth and storytelling elements. By incorporating elements like coral formations, rocks, or aquatic plants around your subject, you create a sense of place that draws viewers in. Use framing devices such as arches, overhangs, or branches to guide the eye toward your main focus. Position your subject so it interacts with its environment, highlighting relationships and scale. This approach not only emphasizes the beauty of the creature or object but also offers insight into its habitat. Remember, the environment isn’t just a background—it’s an active part of the story, enriching your composition and immersing viewers in the underwater world. Additionally, understanding navigation tools such as compasses and GPS devices can help you explore and capture diverse environments more effectively. Incorporating creative exercises from resources like The Creative Spark can also inspire innovative approaches to environmental framing. Exploring different lighting conditions can further enhance the mood and depth of your environmental context in underwater photography. To deepen your understanding, studying underwater ecology can provide valuable insights into the habitats you’re capturing, allowing for more meaningful compositions.
Incorporating Light and Shadows to Enhance Mood
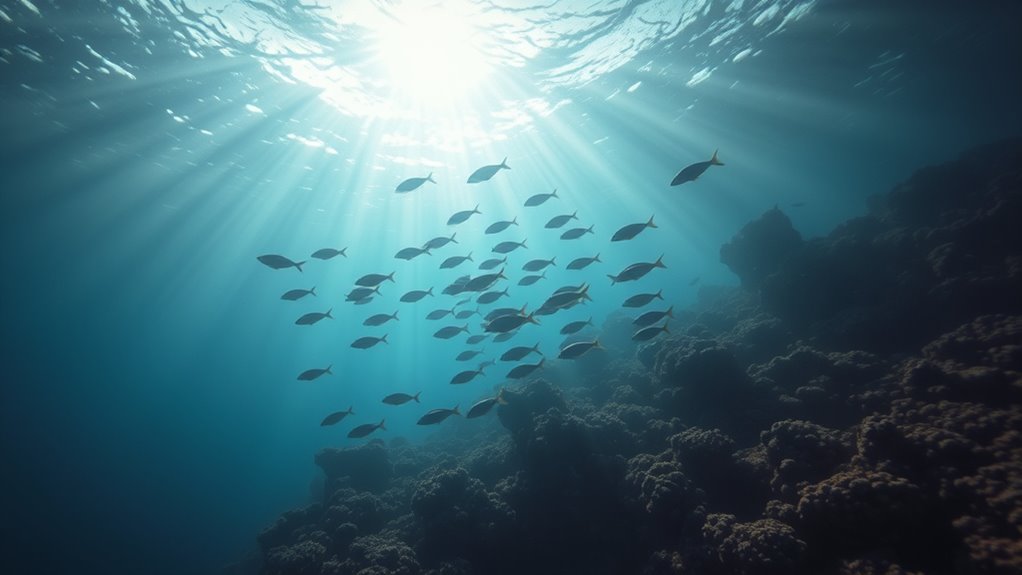
Light and shadows are powerful tools in underwater photography that can dramatically influence the mood of your images. Use natural light filtering through the water to create a sense of depth and mystery. Position yourself to capture rays breaking through the surface, highlighting your subject and adding a dramatic effect. Shadows can add contrast and texture, emphasizing shapes and creating a sense of intrigue. Experiment with different angles to find the best interplay between light and dark areas, shaping the story your photo tells. Don’t be afraid to shoot during various times of day or in different water conditions to achieve unique lighting effects. By thoughtfully incorporating light and shadows, you’ll evoke emotions and craft compelling, mood-rich underwater images.
Focusing on Subjects and Managing Background Distractions
To make your subject stand out, focus tightly on it and avoid capturing too much of the background. Using a background blur effect can help eliminate distractions and keep the viewer’s attention where you want it. Simplifying scene elements guarantees your main subject remains clear and impactful.
Isolate Your Main Subject
Ever wonder how to make your underwater subject stand out amid a busy background? The key is to isolate your main subject effectively. Get close to your subject to reduce background clutter and emphasize it. Use your camera’s focus to ensure the subject is sharp while allowing the background to fall out of focus, creating natural separation. Position yourself so that distracting elements are behind or beside your subject, not in front. Wait for the right moment when the background is less busy or less distracting. Sometimes, changing your angle or perspective helps to simplify the scene. Remember, the clearer and more prominent your subject appears, the more powerful your image will be. Isolation draws viewers’ attention directly to your subject, making your photo more compelling.
Use Background Blur Effect
Using background blur is a powerful technique to make your underwater subjects stand out. When you focus on your subject with a wide aperture, the background becomes soft and out of focus, drawing attention directly to what matters most. This effect helps minimize distractions like cluttered coral or busy fish schools that can divert the viewer’s eye. To achieve this, get close to your subject and use a lens with a wide maximum aperture, such as f/2.8 or wider. Adjust your focus carefully to ensure your subject is sharp while the background remains blurred. This simple technique emphasizes your subject and creates a pleasing sense of depth, making your photos more compelling and professional.
Simplify Scene Elements
Focusing on your subjects and controlling background elements are essential steps in creating compelling underwater photos. To simplify your scene, get close to your subject to eliminate unnecessary background clutter. Use a wide aperture to create a shallow depth of field, blurring distracting elements and highlighting your subject. Move your position to find a clean background that complements your subject rather than competes with it. Avoid busy or cluttered scenes; instead, look for clear, straightforward compositions. Keep your background elements minimal and unobtrusive by adjusting your angle or zoom. By reducing visual noise, your main subject stands out sharply, making your photo more impactful. Simplifying scene elements helps guide viewers’ attention directly to what matters most in your underwater shot.
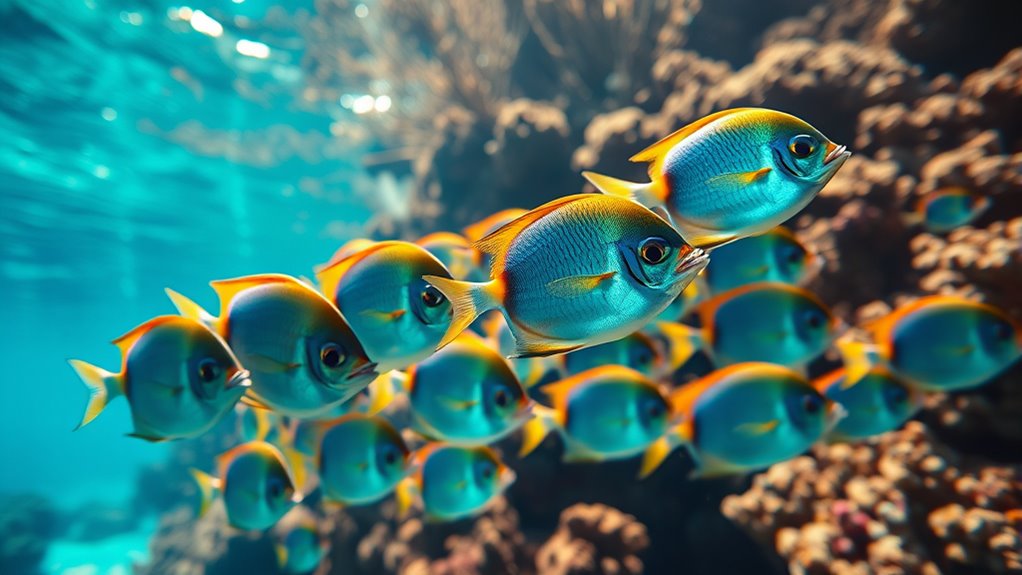
Playing With Color and Contrast for Visual Impact
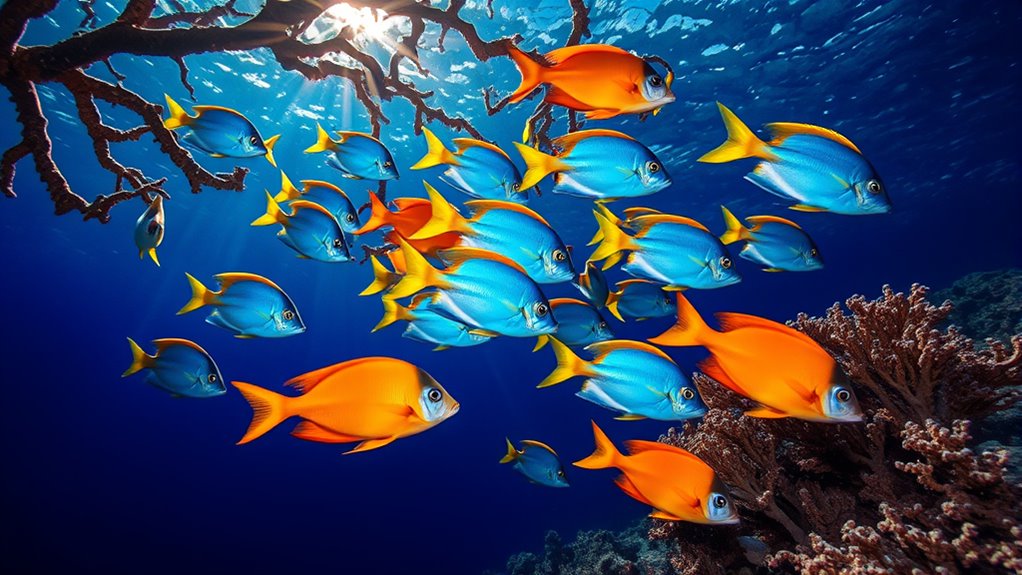
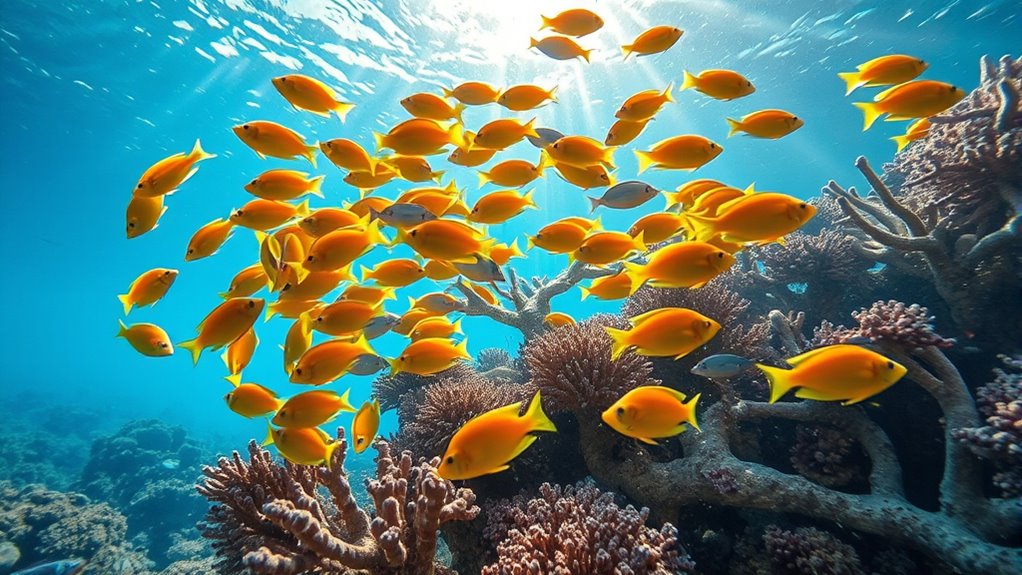
Playing with color and contrast transforms underwater images into striking visuals that capture attention. You can enhance the mood by emphasizing vivid hues or creating dramatic differences between light and dark areas. Use natural light creatively—shoot during midday for bright, colorful scenes or rely on artificial lighting to bring out specific colors. Adjust camera settings to boost contrast, making subjects stand out against their backgrounds. Pay attention to how color interacts with the environment; vibrant coral reefs or schools of colorful fish make compelling focal points. Remember, selective color editing in post-processing can further intensify your images. By playing with color and contrast thoughtfully, you’ll produce images that are not only beautiful but also emotionally impactful and visually compelling.
Experimenting With Perspectives and Angles
Trying different perspectives and angles can dramatically transform your underwater shots, revealing hidden details and creating dynamic compositions. Instead of shooting straight on, experiment with low angles to emphasize the vastness of the scene or shoot from above to highlight patterns on the reef. Get close to your subject to capture intricate textures and eliminate distracting backgrounds. Consider angling your camera upward to include sunlight filtering through the water, adding depth and mood. Try unusual viewpoints, like shooting through coral or from a fish’s eye level, to bring a fresh perspective. Rotating your position even slightly can lead to compelling compositions you might not have noticed. Overall, mixing up your angles keeps your images lively and engaging, making viewers feel as if they’re right there with you.
Frequently Asked Questions
How Does Water Clarity Affect Composition Choices?
Water clarity directly impacts your composition choices underwater. When the water is clear, you can focus on capturing sharp, detailed images with vibrant colors, so you might use wider lenses to showcase the environment. If visibility is limited, you’ll want to get closer to your subject, use a macro or close-up shot, and rely on diffused lighting. Adapting to clarity helps you create compelling images despite varying underwater conditions.
What Gear Is Best for Underwater Framing Techniques?
When choosing gear for underwater framing, you want a sturdy, waterproof camera with a wide-angle lens to capture expansive scenes and close-ups. An underwater housing guarantees your gear stays dry and protected. Use strobes or lights to highlight your subject and reduce backscatter. A good tray or stabilizer helps you maintain steady shots. Always have extra batteries and memory cards handy, so you’re ready to shoot without interruptions.
How to Balance Natural and Artificial Light Underwater?
Think of your underwater scene as a dance between natural sunlight and artificial light, two partners working in harmony. To balance them, start with natural light as your lead, using it to illuminate your subject. Then, add artificial light sparingly to highlight details or fill in shadows. Adjust your camera settings accordingly, and experiment to find the perfect blend, ensuring your images shimmer with balanced, vibrant illumination.
How Does Current Impact Composition Stability?
Current impacts composition stability by creating movement and turbulence that can make your shots blurry or off-center. You need to stay steady and anticipate how currents will shift your position or your subject. Use buoyancy control to maintain your stability, and consider your timing to shoot when the water’s calmer. Adjusting your posture and using support gear helps keep your framing precise despite the water’s movement.
Tips for Capturing Moving Marine Life Effectively?
To capture moving marine life effectively, you should stay patient and observant. Anticipate their movements by watching their behavior and timing your shots accordingly. Use a fast shutter speed to freeze motion, and keep your camera steady to avoid blur. Practice your buoyancy control to maintain stable framing, and take multiple shots to increase your chances of getting a sharp, well-composed image of these dynamic creatures.
Conclusion
Now that you’ve learned these essential underwater composition tips, imagine the breathtaking shots waiting to be captured. With each dive, you’ll discover new ways to frame your subjects and master light in the depths. But remember, the most striking images often come from those unexpected moments—those fleeting scenes that challenge your skills and ignite your creativity. So, are you ready to dive deeper and reveal the secrets lurking beneath the surface?