
TL;DR
Placing your rig in a closet can drastically reduce noise if you focus on proper placement, broad absorption, and ventilation. Foam alone isn’t enough; strategic treatment and sealing matter more than you think.
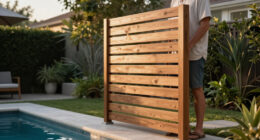
Ever wonder why some small studios sound surprisingly clear while others are a mess of echoes and noise? The secret often isn’t just fancy foam or expensive gear. It’s where you put your rig and how you treat the space around it. Acoustic Dampening, Placement, and the “Rig in the Closet” Setup
If you’re thinking about turning a closet into a makeshift studio or just want a quieter setup, understanding the balance between sound dampening, placement, and heat management can make all the difference. This guide will walk you through the best ways to turn that tiny closet into a practical, quiet, and effective space for your work.
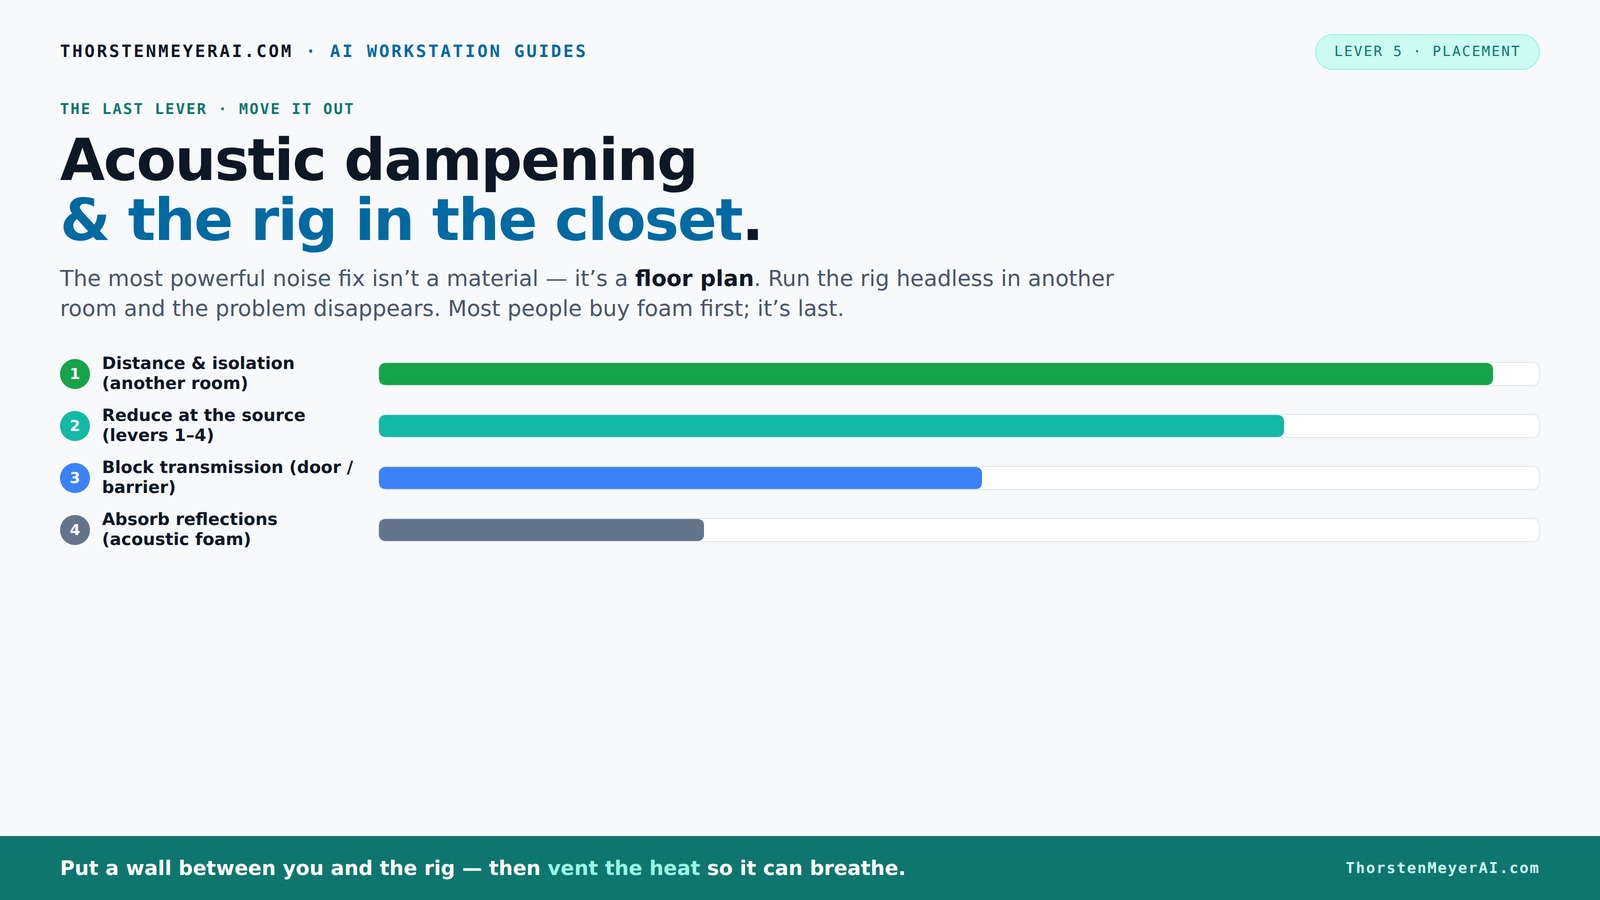
Acoustic dampening
& the rig in the closet.
The most powerful noise fix isn’t a material — it’s a floor plan. A rig you can’t hear because it’s in another room beats any amount of foam. Tap the approaches in Part 1 to see what actually works.
(another room)
(levers 1–4)
(door / barrier)
(acoustic foam)
Contain the noise, not the heat
Key Takeaways
- Placement matters: position your mic to avoid direct reflections and minimize low-frequency buildup.
- Broad absorption beats isolated foam: cover walls, ceiling, and corners with blankets, panels, and bass traps.
- Seal gaps and doors thoroughly to prevent sound leaks, especially in small spaces.
- Ventilation isn’t optional: use quiet exhaust fans or passive vents to prevent heat buildup and equipment throttling.
- A closet can be a surprisingly effective reflection-control space, but don’t expect total soundproofing or perfect acoustics.

36 Pack AUSLET Acoustic Panels 12 x 12 x 2 Inches, Pyramid Sound Proof Foam Panels for Wall, High Density Black Acoustic Foam Panels,Soundproof Wall Panels
- Enhances Sound Quality: Absorbs noise, echoes, and reverb
- Quick Expansion: Fast to expand and regain shape
- Unique Pyramid Design: Provides effective sound control
As an affiliate, we earn on qualifying purchases.
As an affiliate, we earn on qualifying purchases.
Why Your Closet Can Be a Quiet Heaven or a Boxy Echo Chamber
Most people assume small spaces are bad for audio—too many reflections, low-end buildup, and noise leaks. But with smart treatment, a closet can actually reduce reverberation and echo, making your recordings clearer. The key? Proper placement and broad absorption.
For example, a YouTuber transformed a small closet into a vocal booth by lining the walls with thick blankets and acoustic panels. The result? Crisp vocals with minimal background noise, even though the space is tiny. Acoustic Dampening, Placement, and the "Rig in the Closet" Setup
The First Step: Perfect Placement of Your Microphone in a Closet
Where you place your mic inside the closet makes or breaks your sound. Keep it away from walls and corners, which cause low-frequency buildup and standing waves. Instead, position it about a foot away from the wall, angled to avoid reflections hitting the capsule directly.
A common setup: hang the mic on a boom arm in the center of the space, facing a more absorptive surface. For example, placing a foam panel behind the mic reduces rear reflections, improving clarity.
Remember, the first reflection points—where sound bounces directly from the source—are your biggest enemies. Treat those spots with panels or blankets. Acoustic Dampening, Placement, and the "Rig in the Closet" Setup
How to Use Dampening Materials Effectively — Foam, Blankets, and More
Acoustic dampening isn’t about buying a single foam panel and calling it a day. It’s about broad coverage. Use a mix of materials: thick blankets, rugs, acoustic panels, and bass traps. Cover the walls, ceiling, and even the door for best results.
For example, a DIY creator layered moving blankets over the door and added 2-inch foam panels on the side walls. This combination cut the reverb significantly, making vocals sound tight and controlled.
Pro tip: don’t forget corners. Low frequencies tend to build up there. Installing bass traps or foam wedges in corners can tame that boom.
Sealing the Gaps: Stop Sound Leaks at Doors and Cracks
Sound leaks through gaps and open doors more than you think. Weatherstripping, door draft stoppers, or even a heavy blanket over the door can seal those weak points. This stops noise from escaping or entering.
For instance, a musician sealed their closet door with weatherstripping and added a door sweep, reducing noise leakage by over 60%. This simple step made a big difference in keeping external sounds out and your recordings clean.
Tip: check for cracks around vents or electrical outlets—cover or seal these to prevent sound leaks.
Ventilation and Heat Management — Keep It Cool Without Noise
The biggest challenge of putting a high-powered rig in a closet? Heat. Trapped heat can cause your machine to throttle, fans to roar, and noise levels to spike. The solution: proper ventilation.
Use passive vents or quiet exhaust fans to let hot air escape. For example, a YouTuber installed a low-noise exhaust fan connected to a thermostat. When the closet heats up, the fan kicks on, pulling hot air out and keeping the equipment cool.
Active cooling, like liquid coolers with heat exchangers, can also help move heat out without adding noise. Just remember: a sealed space traps heat. Ventilation is non-negotiable.
Learn more about cooling strategies in this detailed guide on reducing heat and noise in your AI workstation.
The Tradeoffs of Using a Closet as a Vocal Booth or Rig Space
While a closet can dramatically cut down outside noise, it’s not a perfect soundproof room. It’s a reflection-control space. Expect some low-end buildup, standing waves, and occasional echo if not treated thoroughly.
Moreover, heat management is a critical tradeoff. Sealing the space tightly can improve sound isolation, but it also traps heat, risking overheating your equipment. This necessitates a balanced approach—adding ventilation or cooling solutions that do not compromise acoustic treatment. Acoustic Dampening, Placement, and the "Rig in the Closet" Setup
Many creators find that a well-treated closet with strategic airflow offers the best compromise. You may not achieve complete soundproofing, but you can create a controlled environment that’s quiet enough and safe for your gear. Acoustic Dampening, Placement, and the "Rig in the Closet" Setup
Frequently Asked Questions
Is acoustic foam enough for a closet studio?
Acoustic foam helps reduce echo and reverb inside the space but doesn’t block outside noise. For best results, combine foam with broad coverage of blankets, panels, and sealing gaps to control both reflections and leaks.Where should I place the microphone in a closet booth?
Place the mic about a foot from the wall, angled to avoid direct reflections. Position it away from corners and reflective surfaces, with a foam panel behind or below to minimize rear and floor reflections.How do I stop heat from building up in a closet rig?
Use quiet exhaust fans, passive vents, or AIO liquid coolers to move heat out of the space. Don’t fully seal the closet—allow airflow to prevent equipment from throttling due to high temperatures.Do I need bass traps in a tiny closet?
Yes, especially in corners where low frequencies tend to build up. Bass traps help control the boominess and standing waves common in small, enclosed spaces.Will moving blankets work as well as foam panels?
Moving blankets are often more effective than foam for broad absorption in small spaces. They cover more surface area and absorb a wider range of frequencies, making them a practical DIY solution.Conclusion
Turning a closet into a vocal booth or workstation isn’t about sealing it tight or piling on foam. It’s about smart placement, broad absorption, and letting your gear breathe. When you treat reflections and control heat, that tiny space becomes a surprisingly capable studio.
Remember: the best soundproofing is keeping noise out *before* it leaves. Focus on placement, coverage, and ventilation, and your closet can become a quiet powerhouse for your creative work.